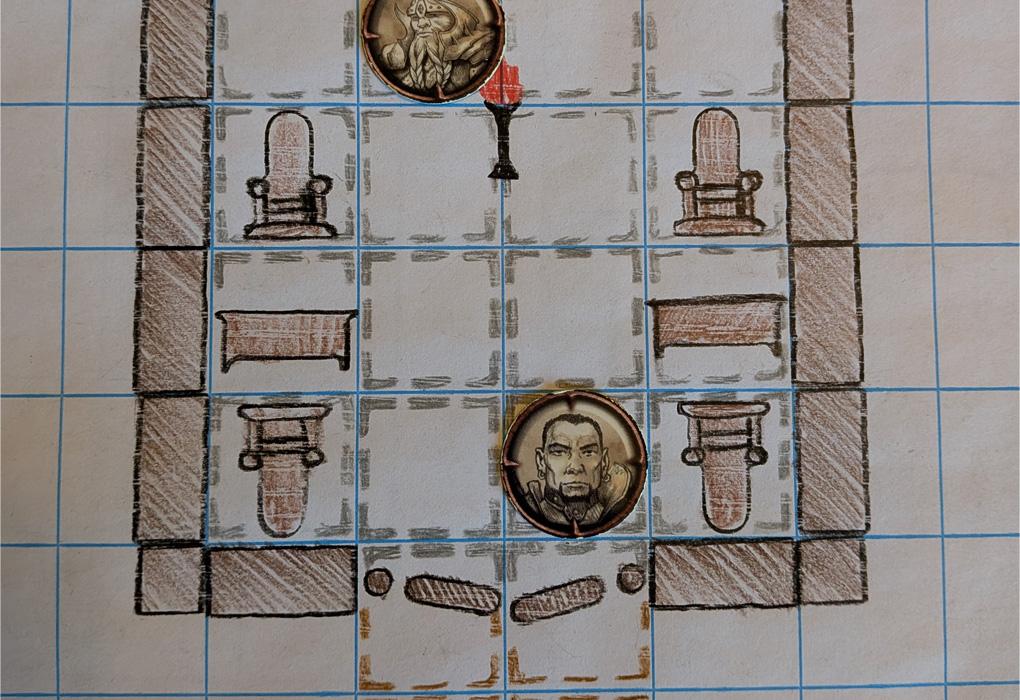
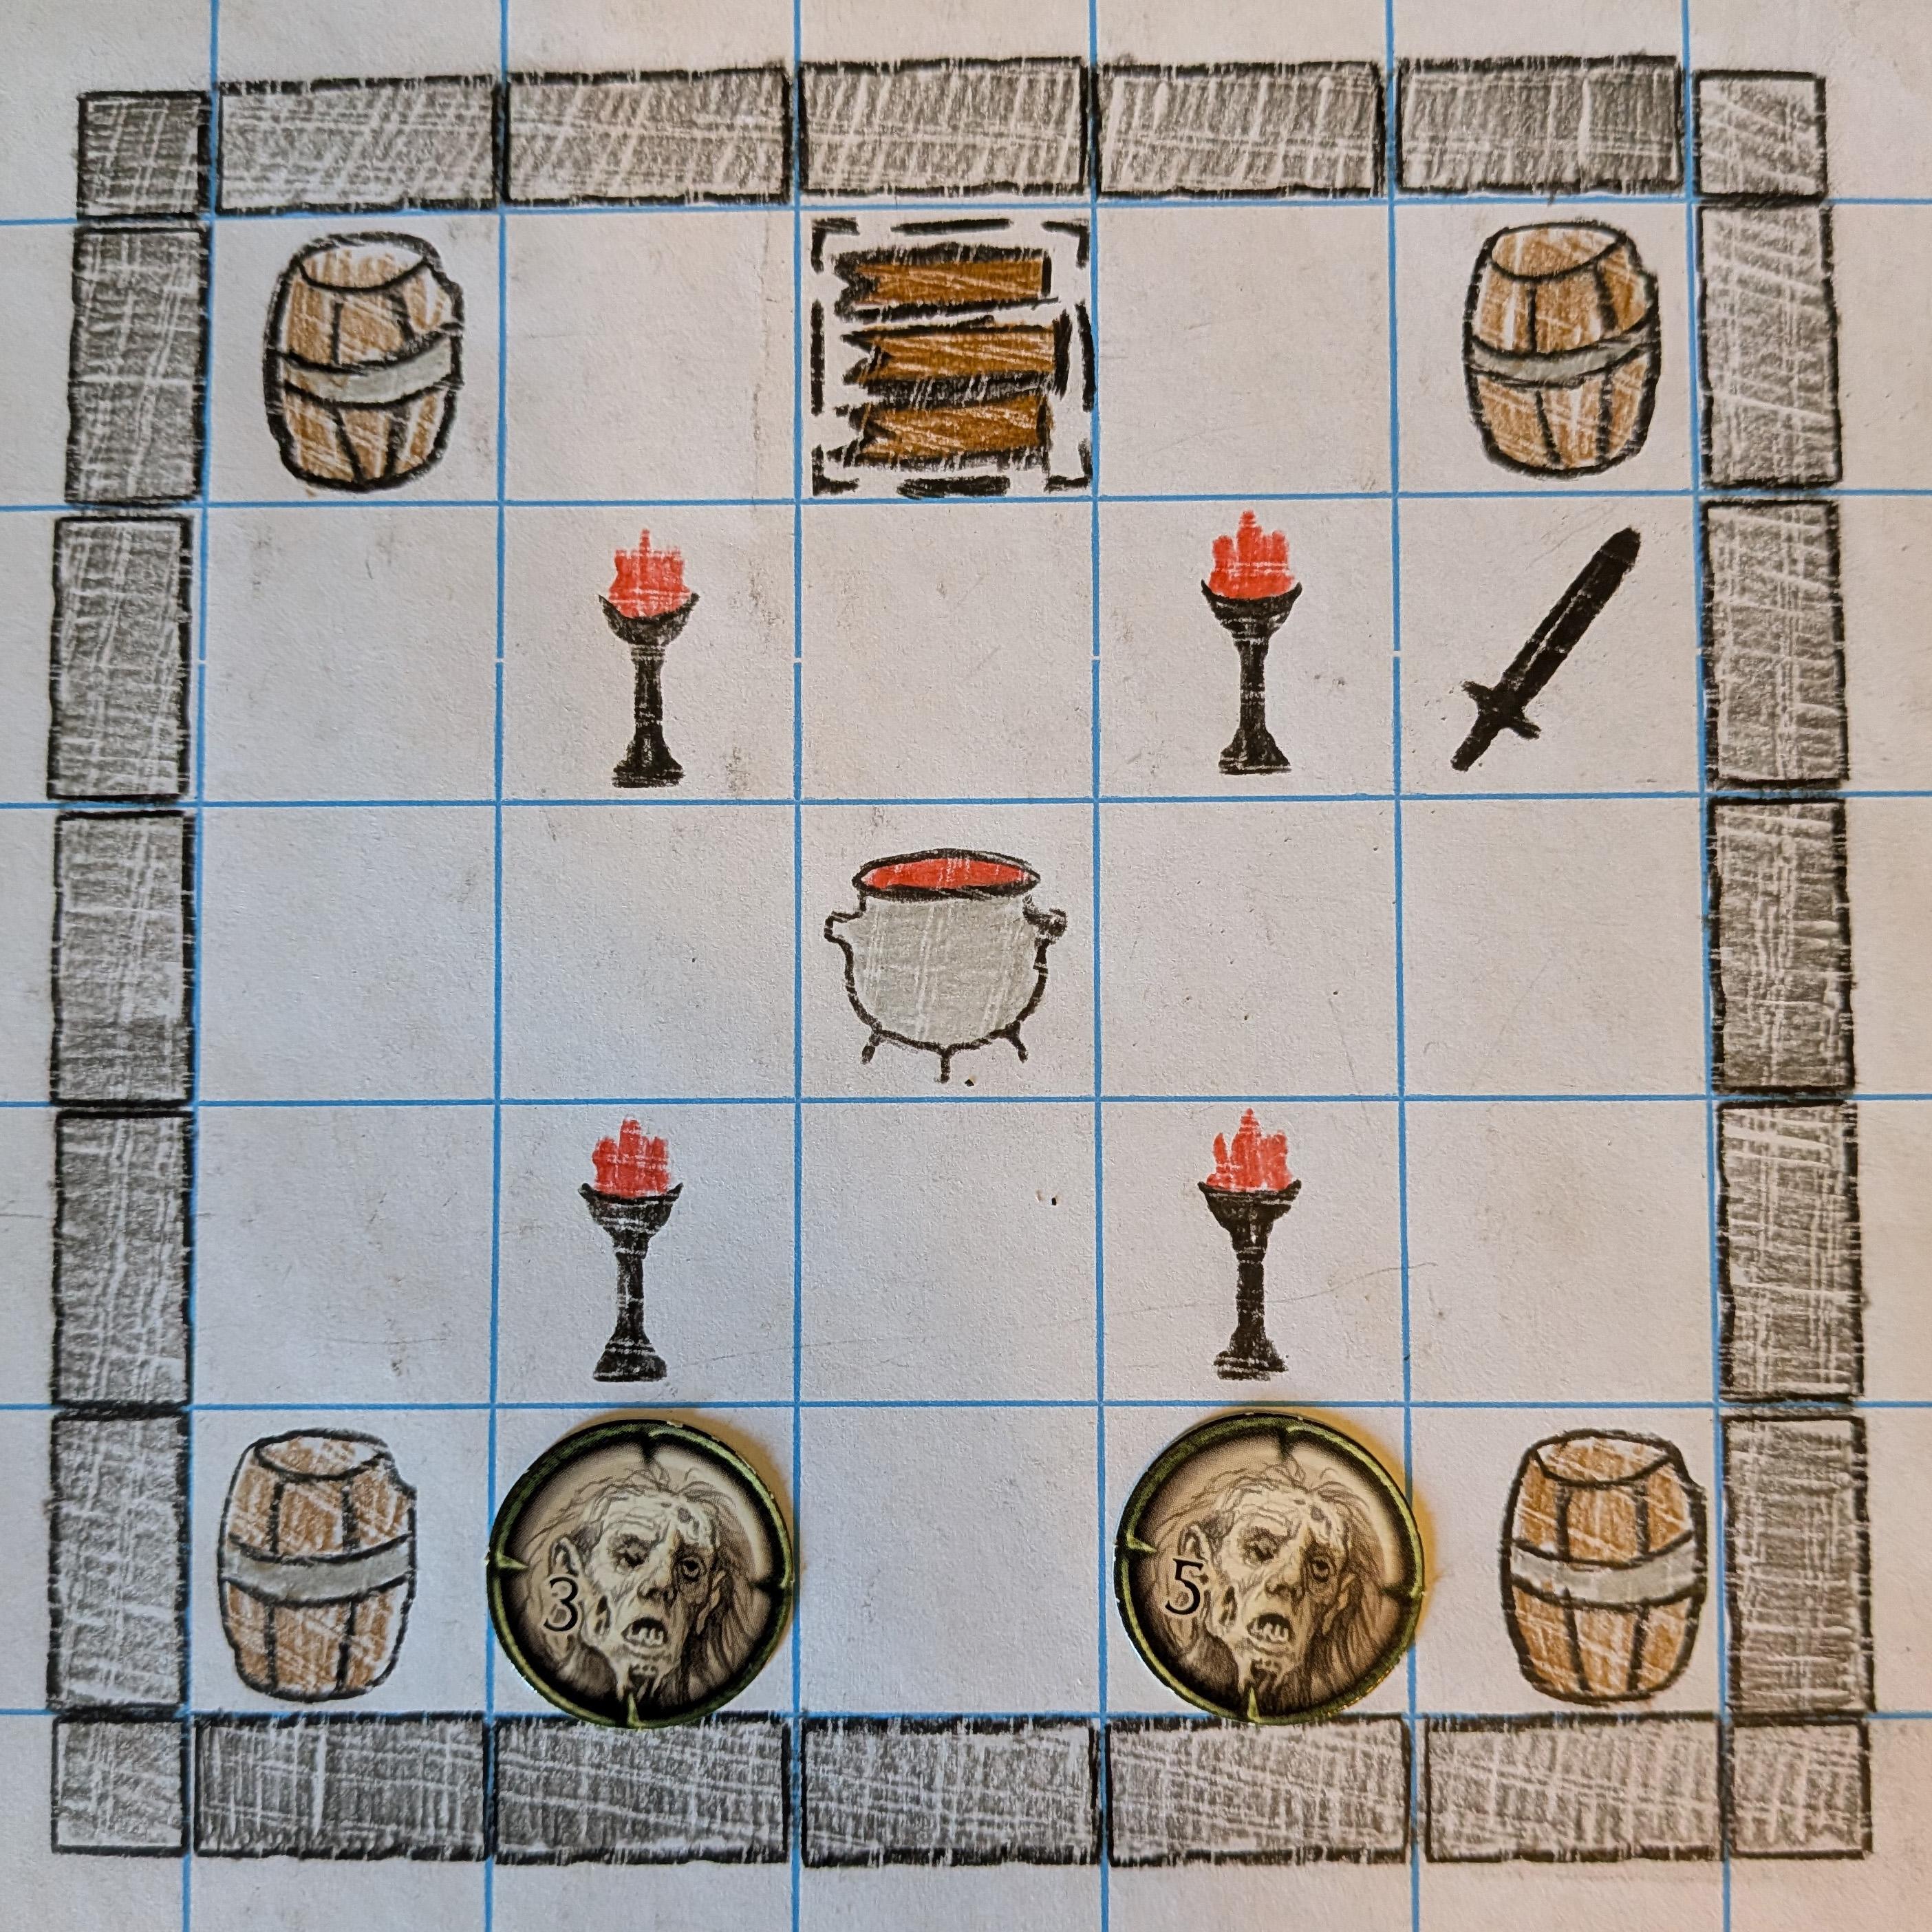
Drawing a battle map by hand can be one of the most enjoyable parts of preparing a tabletop RPG session. It can also become time-consuming when you need to create straight walls, evenly sized doors, recognizable furniture, or a complete dungeon shortly before your players arrive.
D&D stencils provide a faster way to build readable battle maps while preserving the freedom of drawing them yourself.
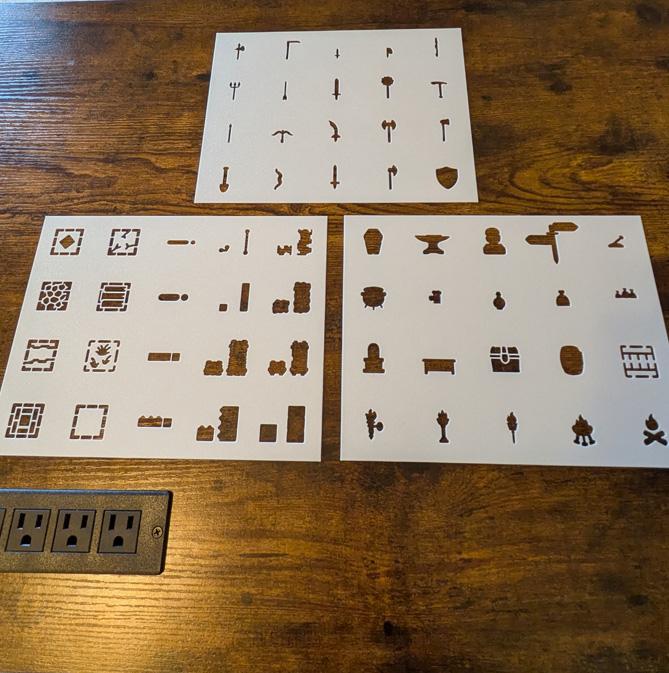
Instead of relying on a fully printed map, a stencil lets you place individual walls, floors, doors, weapons, furniture, and environmental details wherever you need them. You can create a dungeon ahead of time, reveal rooms as the players explore, or quickly sketch an unexpected encounter during the session.
This guide explains what D&D battle-map stencils are, how to use them, and how they can help you create more flexible encounters at the table.
What Are D&D Stencils?
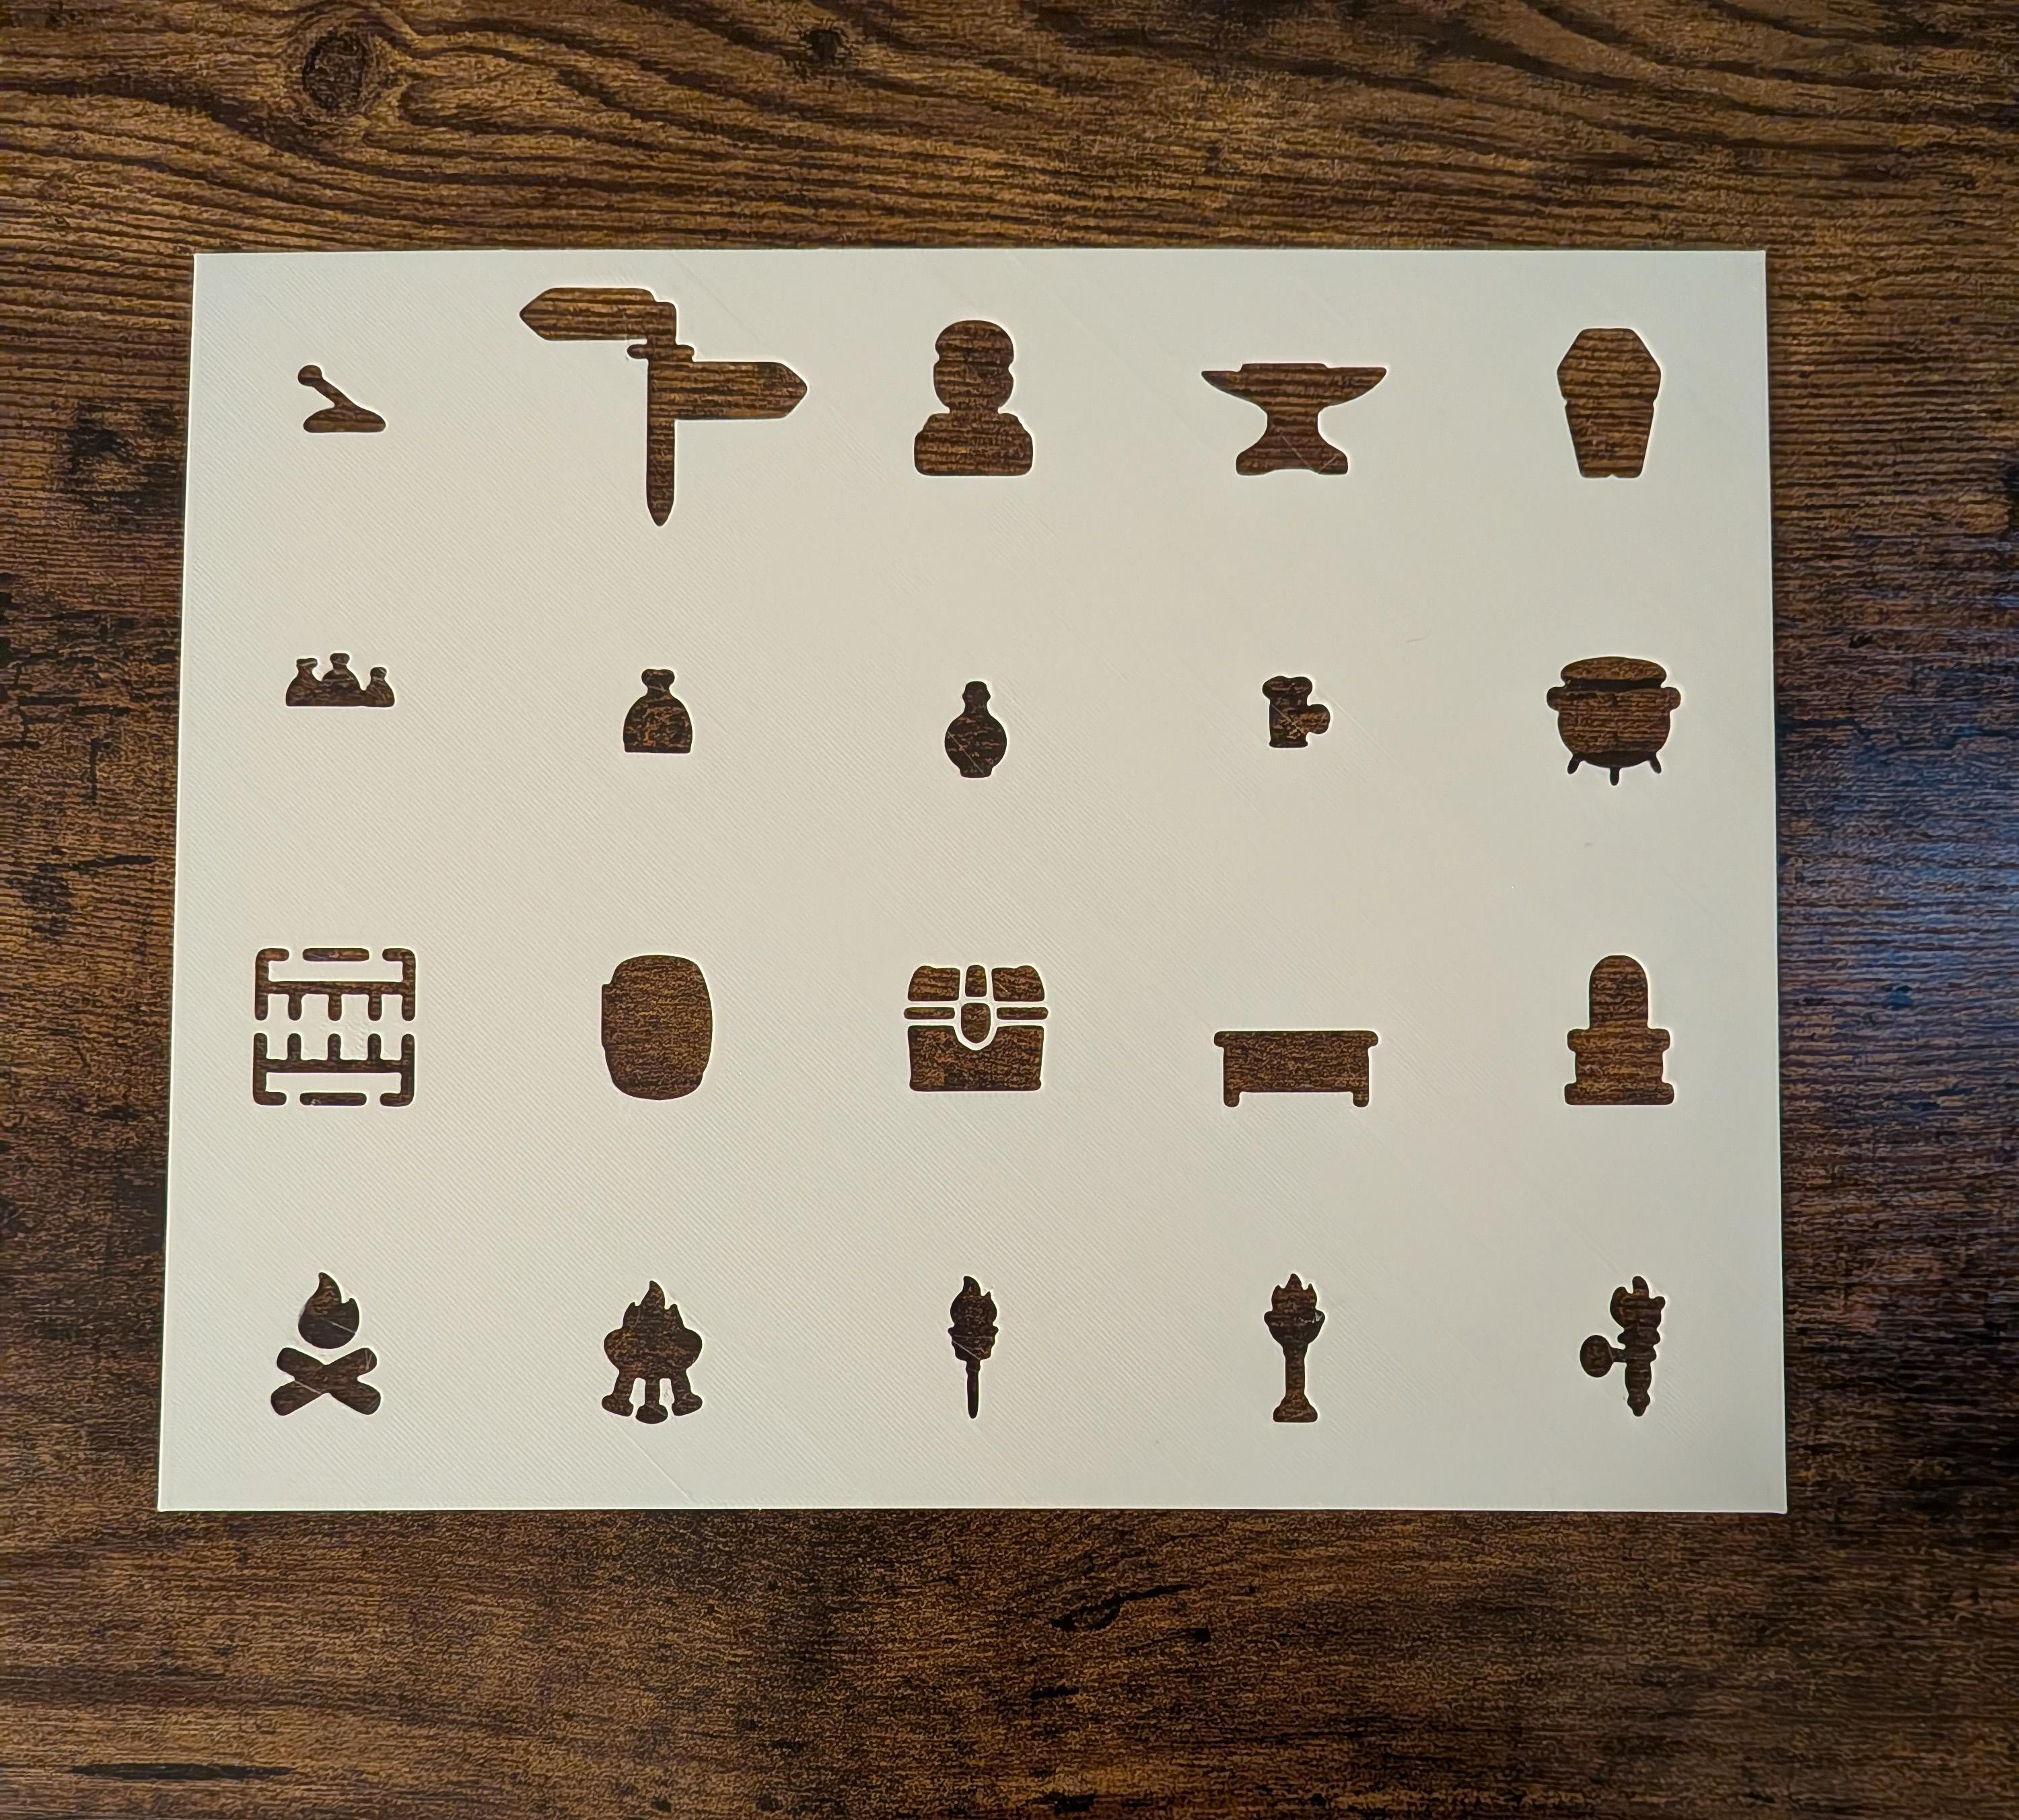
D&D stencils are reusable drawing templates designed to help Game Masters create maps for Dungeons & Dragons and other tabletop role-playing games.
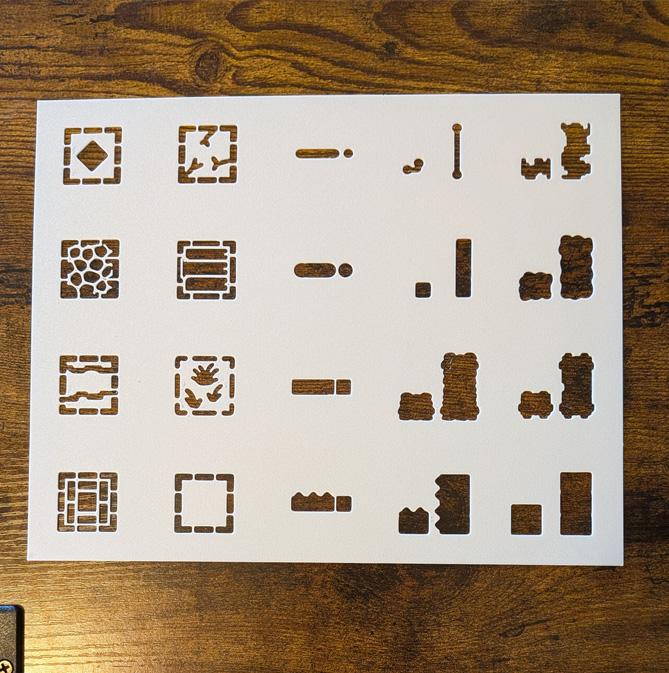
A typical D&D stencil contains cutout shapes representing common battle-map features, such as:
- Stone, wood, dirt, or ruined walls
- Doors and gateways
- Stone, brick, wood, or tile floors
- Tables, crates, barrels, chests, and beds
- Torches, campfires, braziers, and cauldrons
- Weapons, shields, tools, and treasure
- Traps, stairs, ladders, and other encounter features
To use a stencil, place it over your battle mat or paper, hold it in position, and trace or shade through the opening. Once the shape is drawn, move the stencil and continue building the map.
A single stencil set can be reused to create many different locations. The same wall and floor pieces might become a castle in one session, a ruined temple in the next, and an underground hideout after that.
Why Use Stencils for D&D Battle Maps?
The main advantage of a D&D stencil is speed.
You still control the layout and appearance of the map, but you do not have to draw every object from scratch. The template provides a consistent shape that can be repeated throughout the encounter.
Create maps faster
Stencils reduce the time spent carefully drawing individual walls, doors, floor textures, and objects.
A Game Master can outline a room, add a doorway, place several crates, and mark a weapon rack in a matter of minutes. This is especially useful when preparing multiple encounters for the same session.
Make map features easier to recognize
Battle maps need to communicate information quickly.
Players should be able to tell the difference between a wall, a doorway, a table, a fire pit, and a dangerous trap without repeatedly asking what each symbol represents.
Consistent stencil shapes help make important features recognizable from across the table.
Keep the freedom of hand-drawn maps
Printed maps look polished, but they lock you into a specific layout.
D&D map stencils give you more flexibility. You can choose the size and shape of every room, change the placement of doors, add extra cover, or adjust the map to match the decisions your players make.
No two maps have to be identical.
Build unexpected encounters during play
Players rarely follow the exact route a Game Master expects.
They may start a fight inside a tavern, chase an enemy into an alley, investigate an unplanned building, or turn a minor roadside event into a full combat encounter.
A reusable D&D stencil makes it easier to draw these locations as they become necessary.
Reuse the same tools across many adventures
A barrel can appear in a tavern, warehouse, dock, dungeon, market, or bandit camp. A stone wall can become part of a castle, crypt, sewer, temple, or underground ruin.
Because the individual symbols are reusable, a stencil collection becomes more useful as you learn to combine its pieces in different ways.
What Can You Create with D&D Map Stencils?
Stencils can be used for simple combat spaces or complete adventure locations.
Dungeons
Dungeon maps usually begin with walls, corridors, doors, and floor textures.
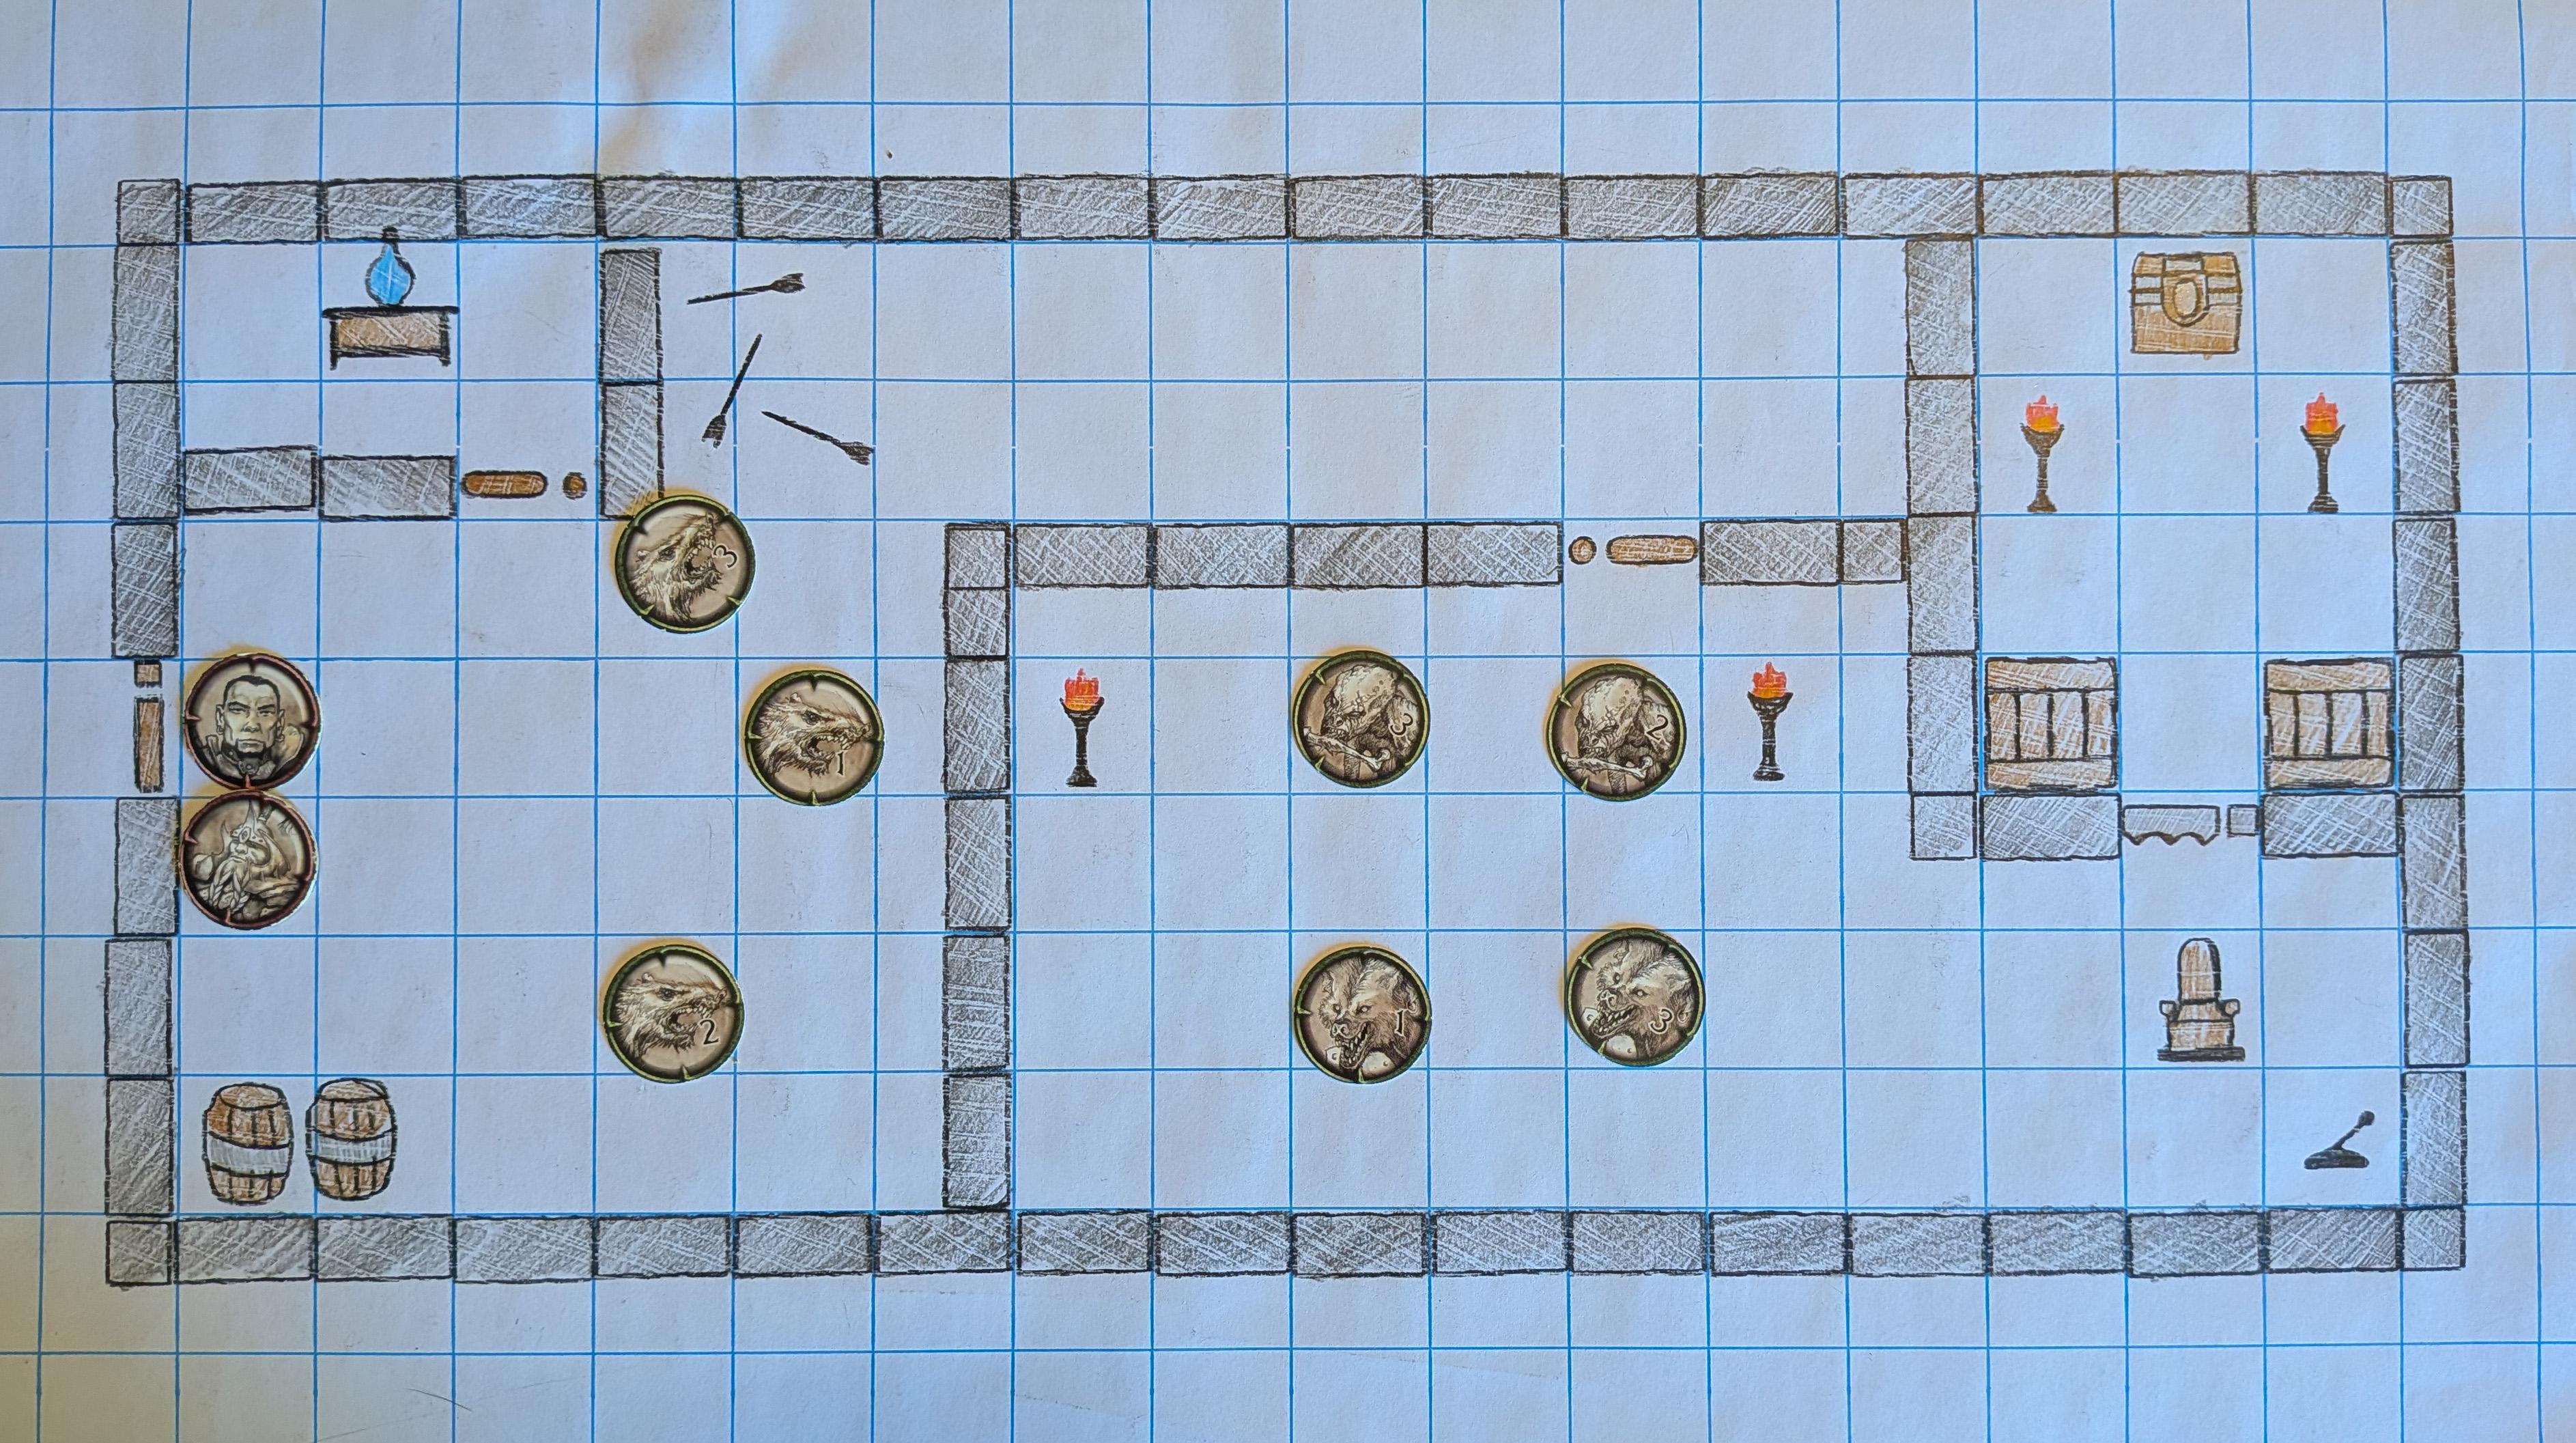
Start by drawing the outer walls of each room. Connect the rooms with passages, add doors at key entrances, and use floor patterns to distinguish chambers from corridors.
After establishing the structure, add details such as:
- Crates and barrels for cover
- Torches and braziers for light
- Chests and bags for treasure
- Stairs and ladders between levels
- Tables, thrones, or altars as focal points
- Weapons and tools that suggest how the room is used
Small environmental details can make two rooms with similar dimensions feel completely different.
Taverns and inns
A tavern battle map can be created with walls, wood flooring, tables, chairs, barrels, a fireplace, and a serving area.
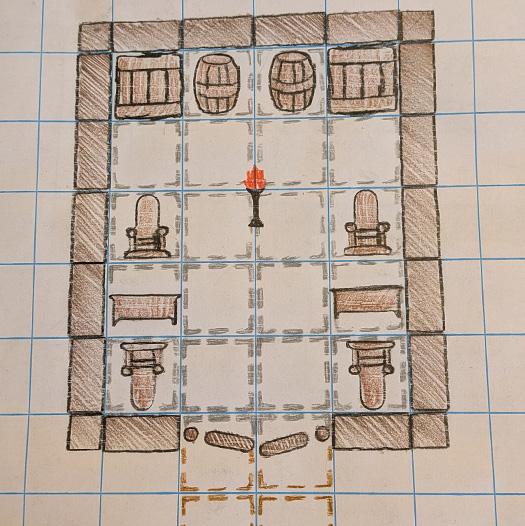
Furniture also creates tactical choices. Tables can provide cover, barrels can block movement, and a narrow doorway can become a defensive position during a fight.
Upstairs rooms can be added with beds, chests, small tables, and hallways.
Castles and keeps
Use stone walls, large doors, tile floors, stairs, weapon symbols, braziers, and throne-room furniture to create a fortified location.
A castle does not need to be drawn all at once. You can map only the gatehouse, great hall, courtyard, or tower level that the players are currently exploring.
Caves and ruins
Irregular wall sections, cracked floors, rubble, broken furniture, and scattered objects can make a map feel damaged or naturally formed.
Avoid making every cave wall perfectly straight. Rotate and offset stencil shapes to create uneven edges and narrow passages.
Camps and outdoor encounters
D&D stencils are not limited to indoor maps.
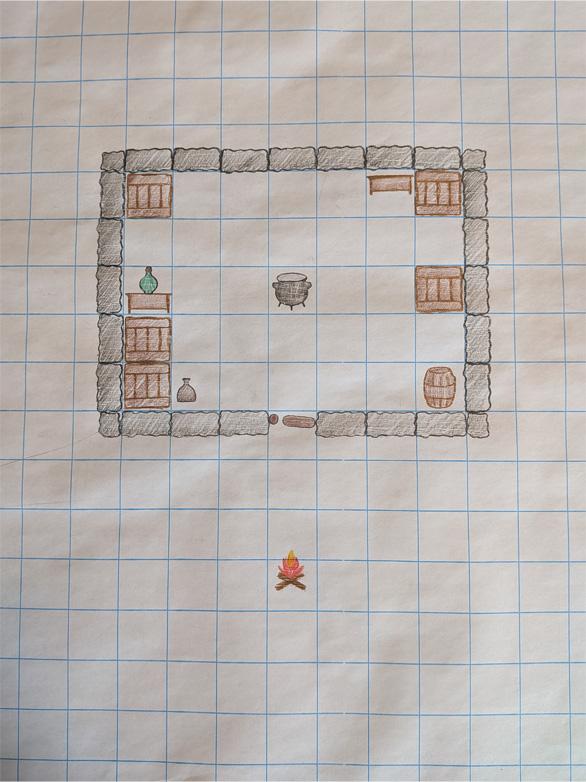
Campfires, tents, fences, crates, carts, logs, rocks, and ground textures can establish an outdoor encounter quickly. You can create a bandit camp, military checkpoint, roadside ambush, goblin outpost, or forest campsite.
Towns and buildings
Walls, doors, floors, furniture, and props can be combined to create houses, shops, blacksmiths, warehouses, temples, and town squares.
You do not need to draw every building in a town. Focus on the spaces where exploration, conversation, or combat is likely to happen.
How to Use D&D Stencils
The exact process will depend on your drawing surface and marker, but the basic method is straightforward.
Step 1: Choose your drawing surface
D&D stencils can be used on surfaces such as:
- Paper
- Poster board
- Grid paper
- Dry-erase battle mats
- Wet-erase battle mats
- Other tabletop mapping surfaces
Before using a marker on a reusable mat, test it in a small corner. Confirm that the ink can be removed without staining the surface.
Use only markers recommended by the manufacturer of your battle mat.
Step 2: Plan the major spaces
Before adding details, decide where the important rooms and pathways will go.
You do not need a perfect architectural drawing. A simple plan might include:
- One entrance
- Two or three main rooms
- A narrow corridor
- A hidden side room
- An exit or staircase
Place miniatures or tokens on the blank grid to estimate how much space the encounter needs. This helps prevent rooms from becoming too small once combat begins.
Step 3: Draw the walls
Begin with the largest structural features.
Place the wall stencil against the grid and trace the required length. Move it carefully to extend the wall, create corners, or divide the map into separate rooms.
Different wall designs can communicate different materials or conditions. Stone walls might represent a dungeon, while wood walls could indicate a tavern, cabin, or warehouse.
Step 4: Add doors and entrances
Once the walls are complete, place doors where creatures can move between rooms.
Door size matters during tactical play. A narrow entrance may allow only one character to pass at a time, while a large doorway can accommodate several creatures.
Doors can also communicate importance. A reinforced or decorative entrance may lead to a throne room, vault, temple, or boss encounter.
Step 5: Add floor textures
Floor stencils help visually separate spaces and establish the character of a location.
For example:
- Stone floors work well for dungeons and castles.
- Wood floors fit taverns, homes, and ships.
- Cracked floors suggest ruins or dangerous structures.
- Tile floors can indicate temples, palaces, or wealthy estates.
- Dirt and grass textures can establish caves or outdoor spaces.
You do not need to fill every square with texture. A few sections can be enough to make the material clear.
Step 6: Place furniture and environmental objects
Now add the features that make the location functional.
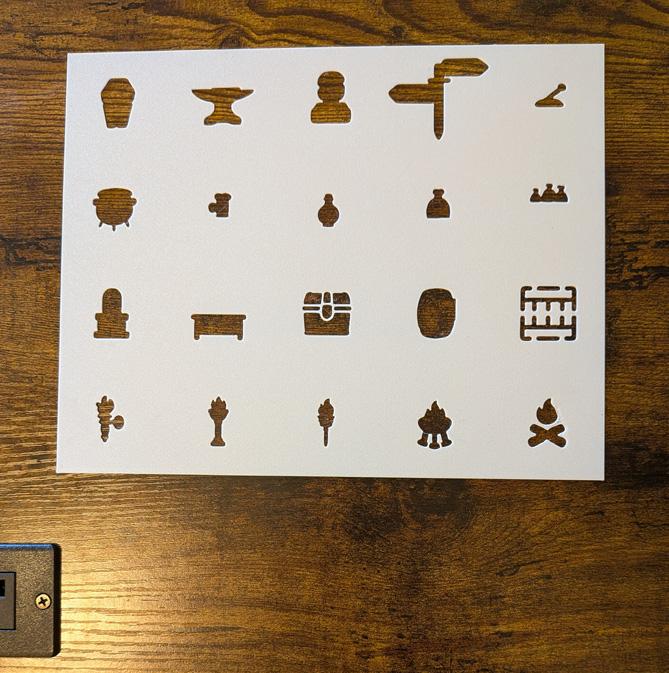
Think about what normally happens in the room.
A storage area might contain crates, barrels, bags, and shelves. A guard room could contain a table, weapons, and a wall torch. A wizard’s chamber may include a desk, cauldron, flask, chest, and unusual floor markings.
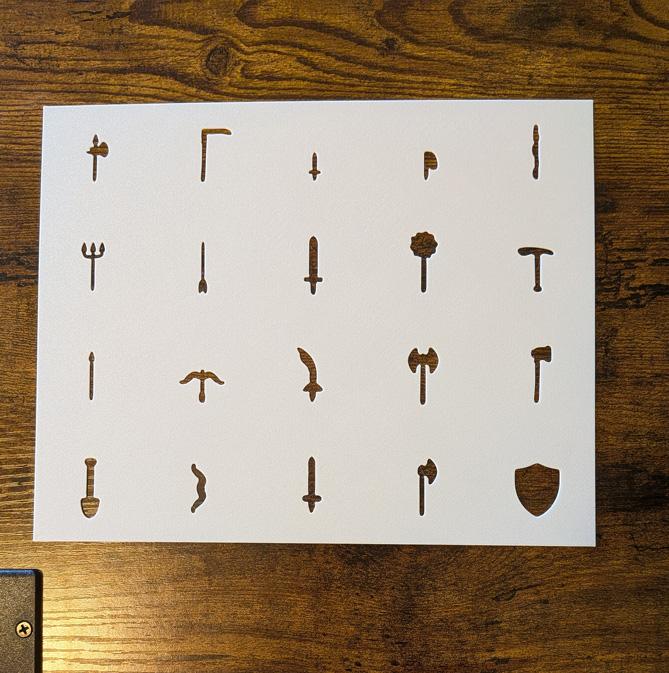
These objects can also affect combat by creating:
- Cover
- Difficult terrain
- Choke points
- Climbing opportunities
- Hazards
- Interactive objects
The best props contribute to both the story and the encounter.
Step 7: Mark hazards and important clues
Use clear symbols for traps, fire, damaged floors, hidden doors, or other dangerous features.
Some Game Masters draw hazards only after the players discover them. Others place subtle visual clues on the map, such as cracked stones near a pit trap or scattered weapons near an ambush point.
Decide what information the characters can see and reveal the rest when appropriate.
Step 8: Add labels only when necessary
Labels can clarify unusual features, but too much writing can make the map difficult to read.
Use short notes for objects that cannot be represented clearly with a symbol. Keep secret information in your session notes rather than writing it on the player-facing map.
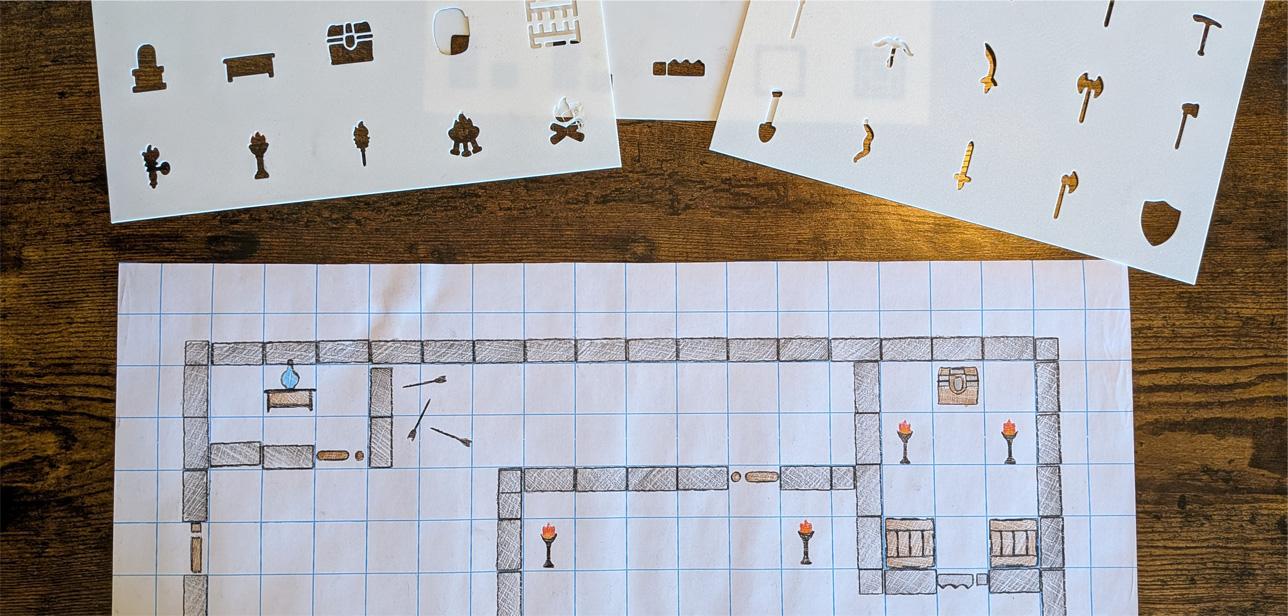
A Simple D&D Stencil Map Example
Imagine that the party discovers a smuggler hideout beneath an abandoned warehouse.
You could build the map with the following pieces:
- Use stone walls to create an underground entrance chamber.
- Add a small door leading into a storage room.
- Place crates, barrels, and bags throughout the storage area.
- Draw a narrow corridor connecting the room to a larger chamber.
- Add a table, tankards, and a wall torch to show where the smugglers gather.
- Place weapon symbols near a rack or supply area.
- Add a chest behind the leader’s chair.
- Draw a hidden exit leading toward the sewer.
This layout gives the players several tactical options. They can use crates as cover, block the narrow corridor, search the chest, or pursue escaping enemies through the hidden passage.
The story and the combat mechanics both emerge from the same collection of simple stencil shapes.
Tips for Better Stenciled Battle Maps
Keep the map readable
A battle map does not need to contain every decorative object that might exist in the location.
Prioritize features that help players understand the space or make meaningful decisions.
Leave room for miniatures
Furniture and floor details should not make it difficult to see grid spaces or place miniatures.
Keep the center of important combat areas relatively open unless clutter is part of the encounter.
Use different line weights
Thicker lines can represent walls and major barriers. Thinner lines can be used for furniture, textures, and decorative details.
This creates a visual hierarchy that makes the map easier to understand.
Rotate and combine shapes
A stencil does not need to be used in only one orientation.
Rotate objects, overlap textures, extend walls, and combine multiple symbols to create new arrangements. Reusing the same pieces in different ways prevents your maps from feeling repetitive.
Create the map in layers
Build the encounter in this order:
- Walls and room shapes
- Doors and paths
- Floor textures
- Furniture and cover
- Hazards and special details
Working from large elements to small details reduces mistakes and keeps the layout organized.
Reveal rooms gradually
When exploring a dungeon, consider covering undiscovered sections of the map with paper or drawing each area only when the party reaches it.
This preserves uncertainty and prevents players from seeing secret rooms or future encounters too early.
D&D Stencils vs. Printed Battle Maps
Both options can be useful, but they solve different problems.
Printed battle maps provide detailed artwork and are ready to use immediately. They work well when you know exactly which location you need.
D&D stencils offer more flexibility. They allow you to:
- Change room dimensions
- Move doors and furniture
- Adapt encounters during play
- Create original locations
- Reuse the same tools for different adventures
Many Game Masters use both. A printed map may be ideal for an important set-piece battle, while a reusable stencil works well for random encounters, improvised locations, and maps that need to match a specific adventure.
D&D Stencils vs. Drawing Freehand
Freehand drawing gives you complete creative freedom, but recognizable objects can take time to sketch.
A D&D stencil provides a middle ground. The map remains hand-built and customizable, but recurring features can be drawn quickly and consistently.
You can also combine the methods. Use stencils for walls, doors, furniture, and other common objects, then draw unusual terrain or unique features by hand.
Who Are D&D Battle-Map Stencils For?
D&D stencils are especially useful for:
- Dungeon Masters who run in-person games
- New Game Masters learning to build encounters
- Groups that use dry-erase or wet-erase battle mats
- Players who enjoy hand-drawn maps
- Game Masters who frequently improvise
- Teachers, clubs, and organized-play groups
- Creators who design tabletop adventures
- Anyone who wants reusable alternatives to printed maps
You do not need to be an artist to use a stencil. The purpose is to make map creation easier, faster, and more approachable.
Build Your Own Battle Maps with RPG Stencils
RPG Stencils are designed to help Game Masters build flexible tabletop maps using reusable walls, floors, doors, furniture, weapons, and encounter details.
Use them to prepare a complete dungeon before the session or keep them nearby for the moment your players turn an unexpected location into a battle map.
Explore the RPG Stencils collection to start building dungeons, taverns, ruins, camps, hideouts, and other adventure locations one piece at a time.
Frequently Asked Questions
What is a D&D stencil?
A D&D stencil is a reusable template containing shapes used to draw tabletop RPG battle maps. The shapes may represent walls, doors, floors, furniture, weapons, terrain, traps, and other encounter features.
Do I need artistic skill to use D&D stencils?
No. Stencils are intended to make common map features easier to draw. You still decide how the encounter is arranged, but the template helps create recognizable and consistent shapes.
Can D&D stencils be used on a dry-erase battle mat?
They can be used on many dry-erase surfaces, but you should always follow the battle-mat manufacturer’s instructions. Test the marker and stencil in a small area before drawing a complete map.
Can I use one D&D stencil set for different adventures?
Yes. Reusable walls, floors, doors, and props can be rearranged to create many locations. The same set might be used for a dungeon, tavern, castle, cave, warehouse, campsite, or town building.
Are D&D stencils better than dungeon tiles?
They serve different purposes. Dungeon tiles are fast to assemble and often include finished artwork. Stencils provide more control over room shapes, dimensions, object placement, and improvised changes.
Can stencils be used with a one-inch grid?
Yes. Stencils designed for tabletop battle maps can be aligned with a one-inch grid so that rooms, doors, furniture, and pathways remain compatible with standard miniatures and tokens.
What should I draw first when making a battle map?
Start with walls and major room shapes. Add doors and pathways next, followed by floor textures, furniture, cover, hazards, and decorative details.
Can I combine stencils with freehand drawing?
Yes. Many Game Masters use stencils for common objects and draw unique terrain, magical effects, natural formations, or adventure-specific details by hand.
Are reusable stencils useful during a live game?
Yes. They are particularly helpful when the players enter an unexpected location or trigger an encounter that was not mapped in advance. A few reusable shapes can establish the important features quickly.
What types of maps can I make with D&D stencils?
You can create dungeons, taverns, castles, caves, ruins, camps, roads, town buildings, temples, hideouts, warehouses, graveyards, throne rooms, and many other tabletop encounter locations.