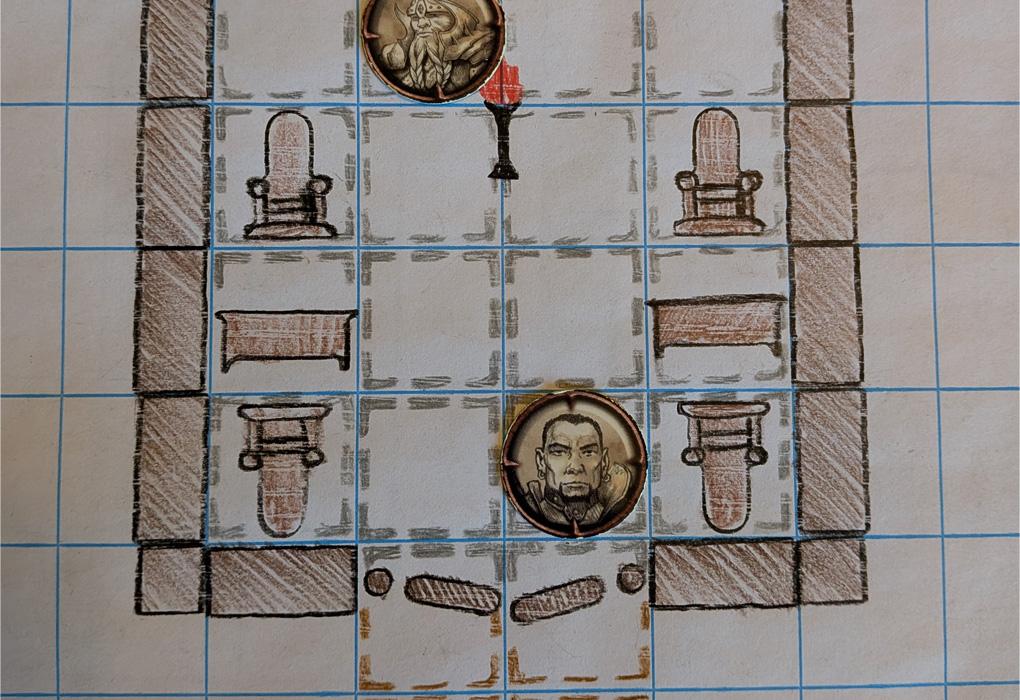
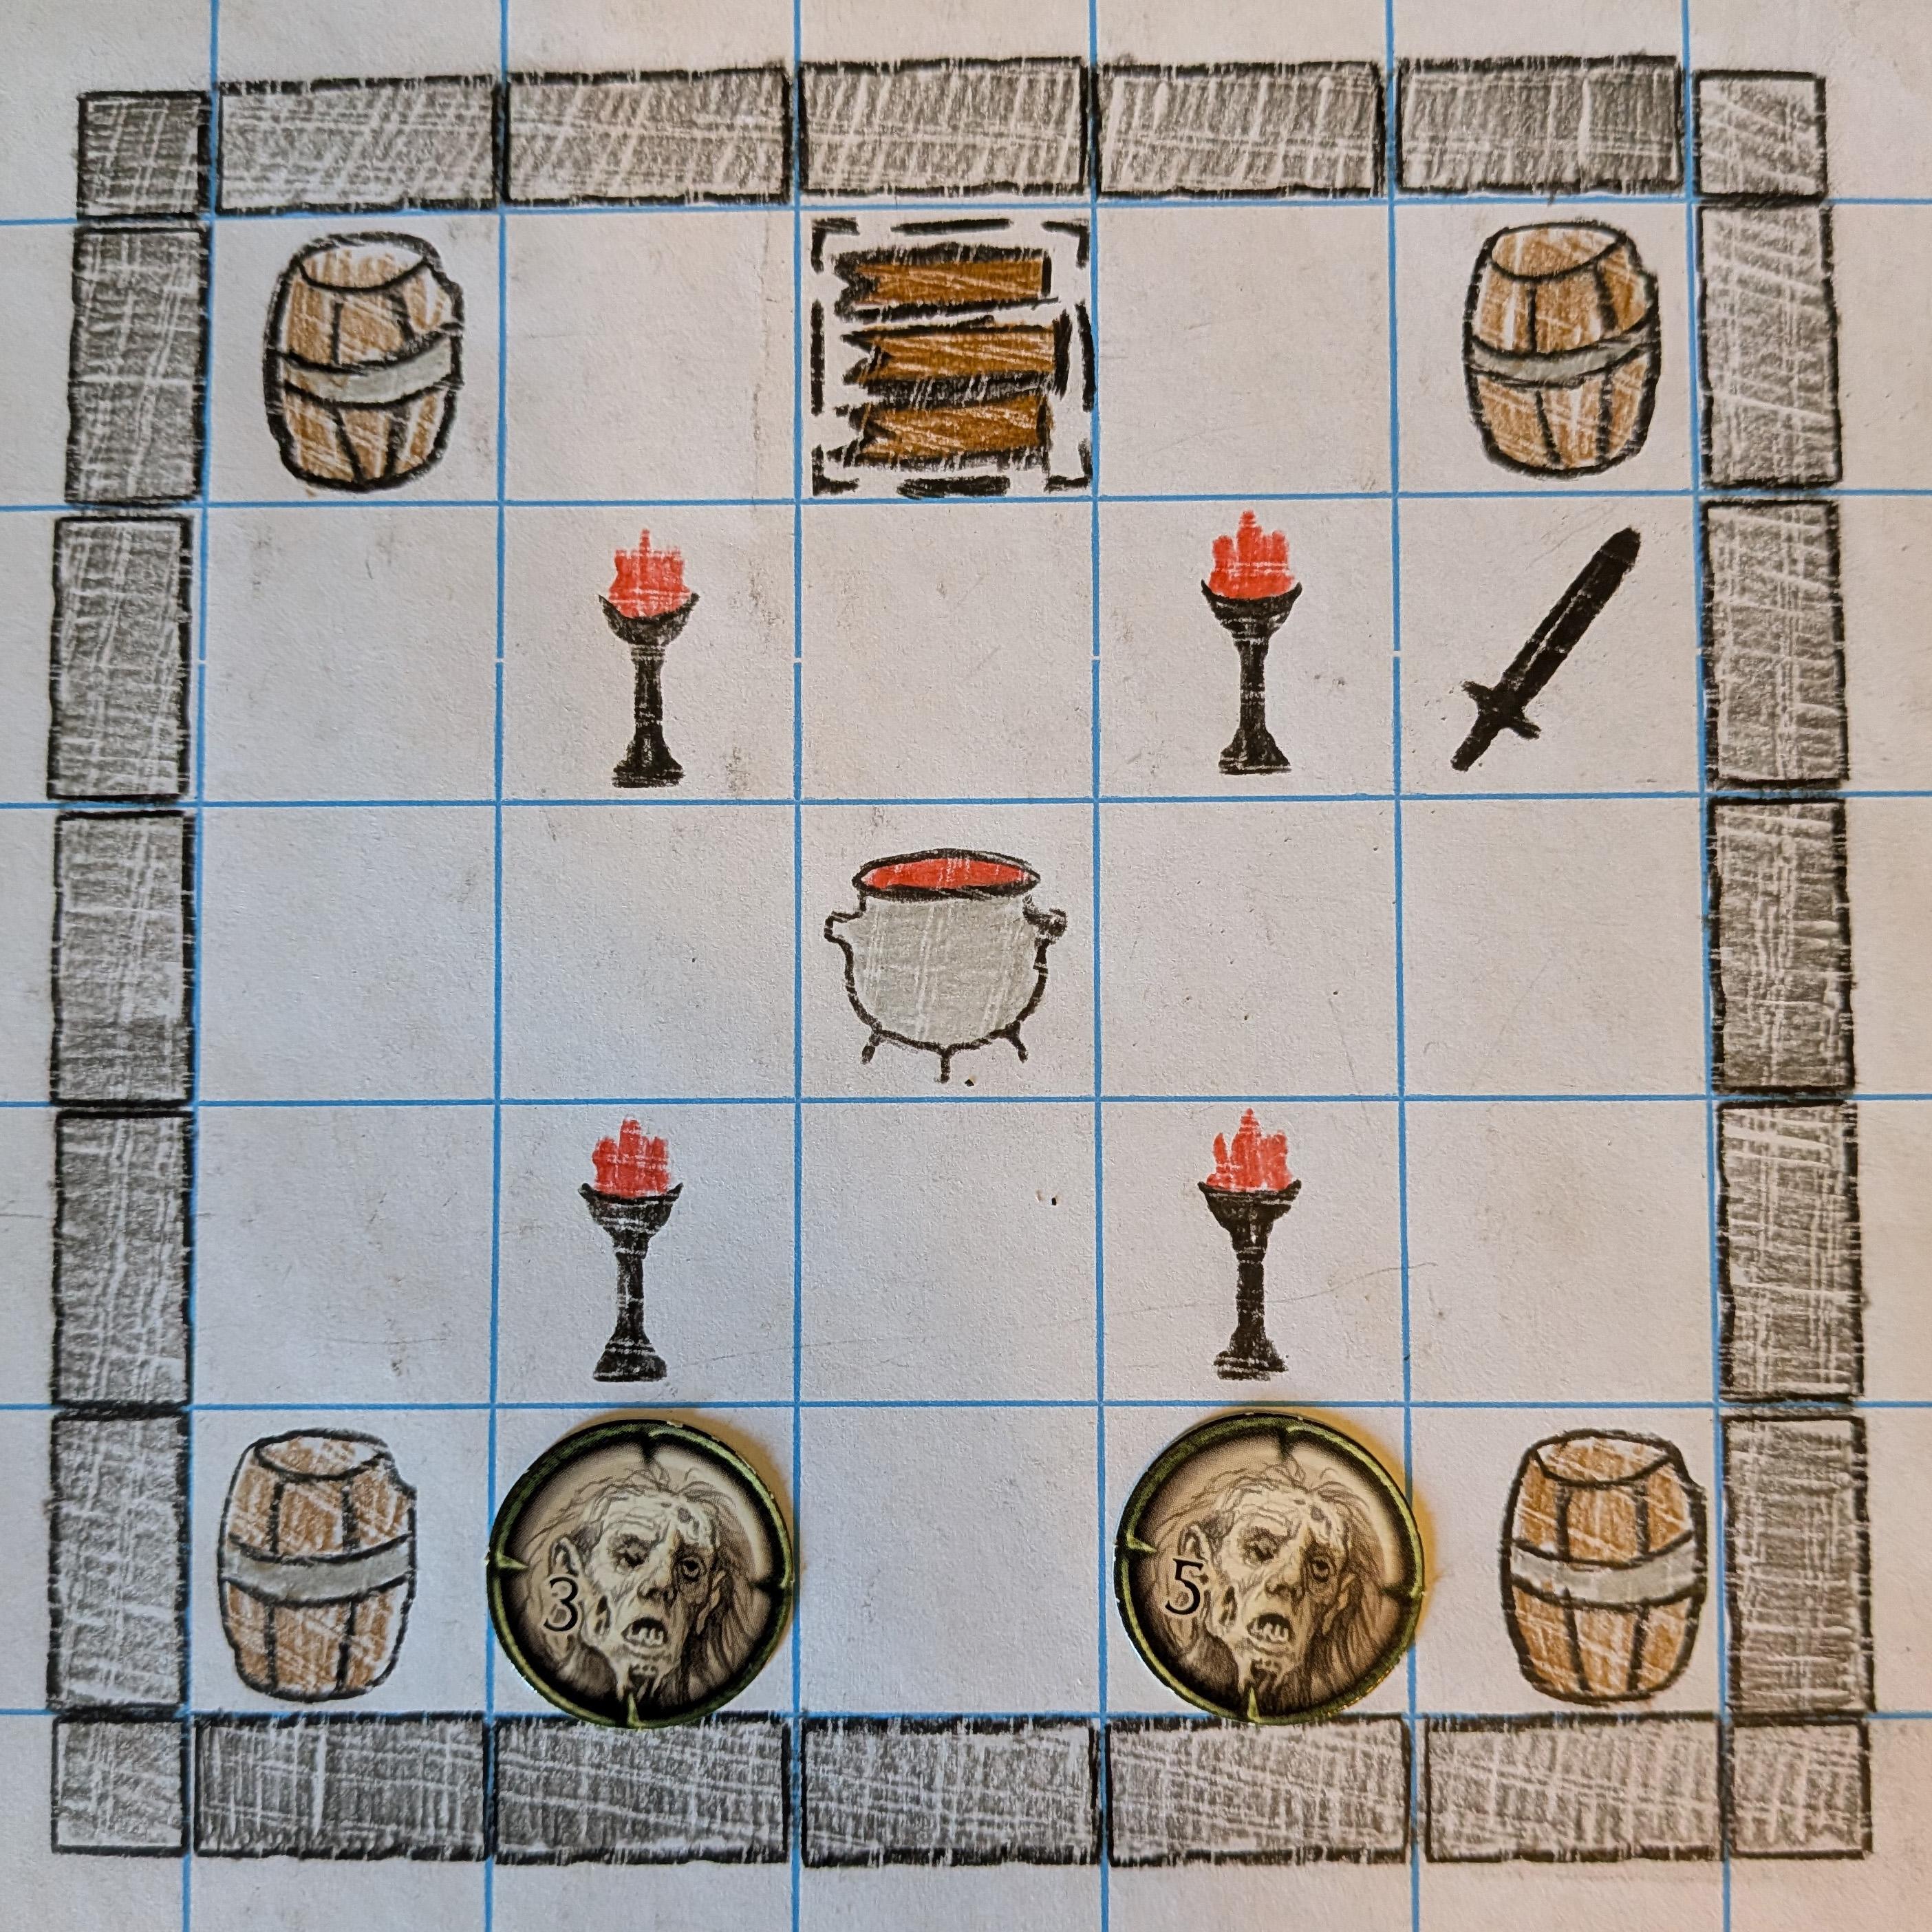
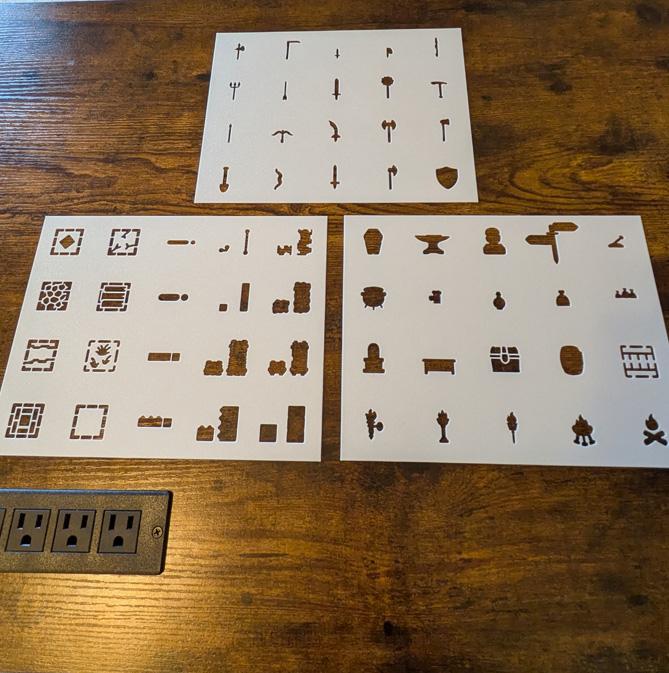
A good D&D battle map does not need to look like a professional illustration.
It needs to help the players understand the encounter.
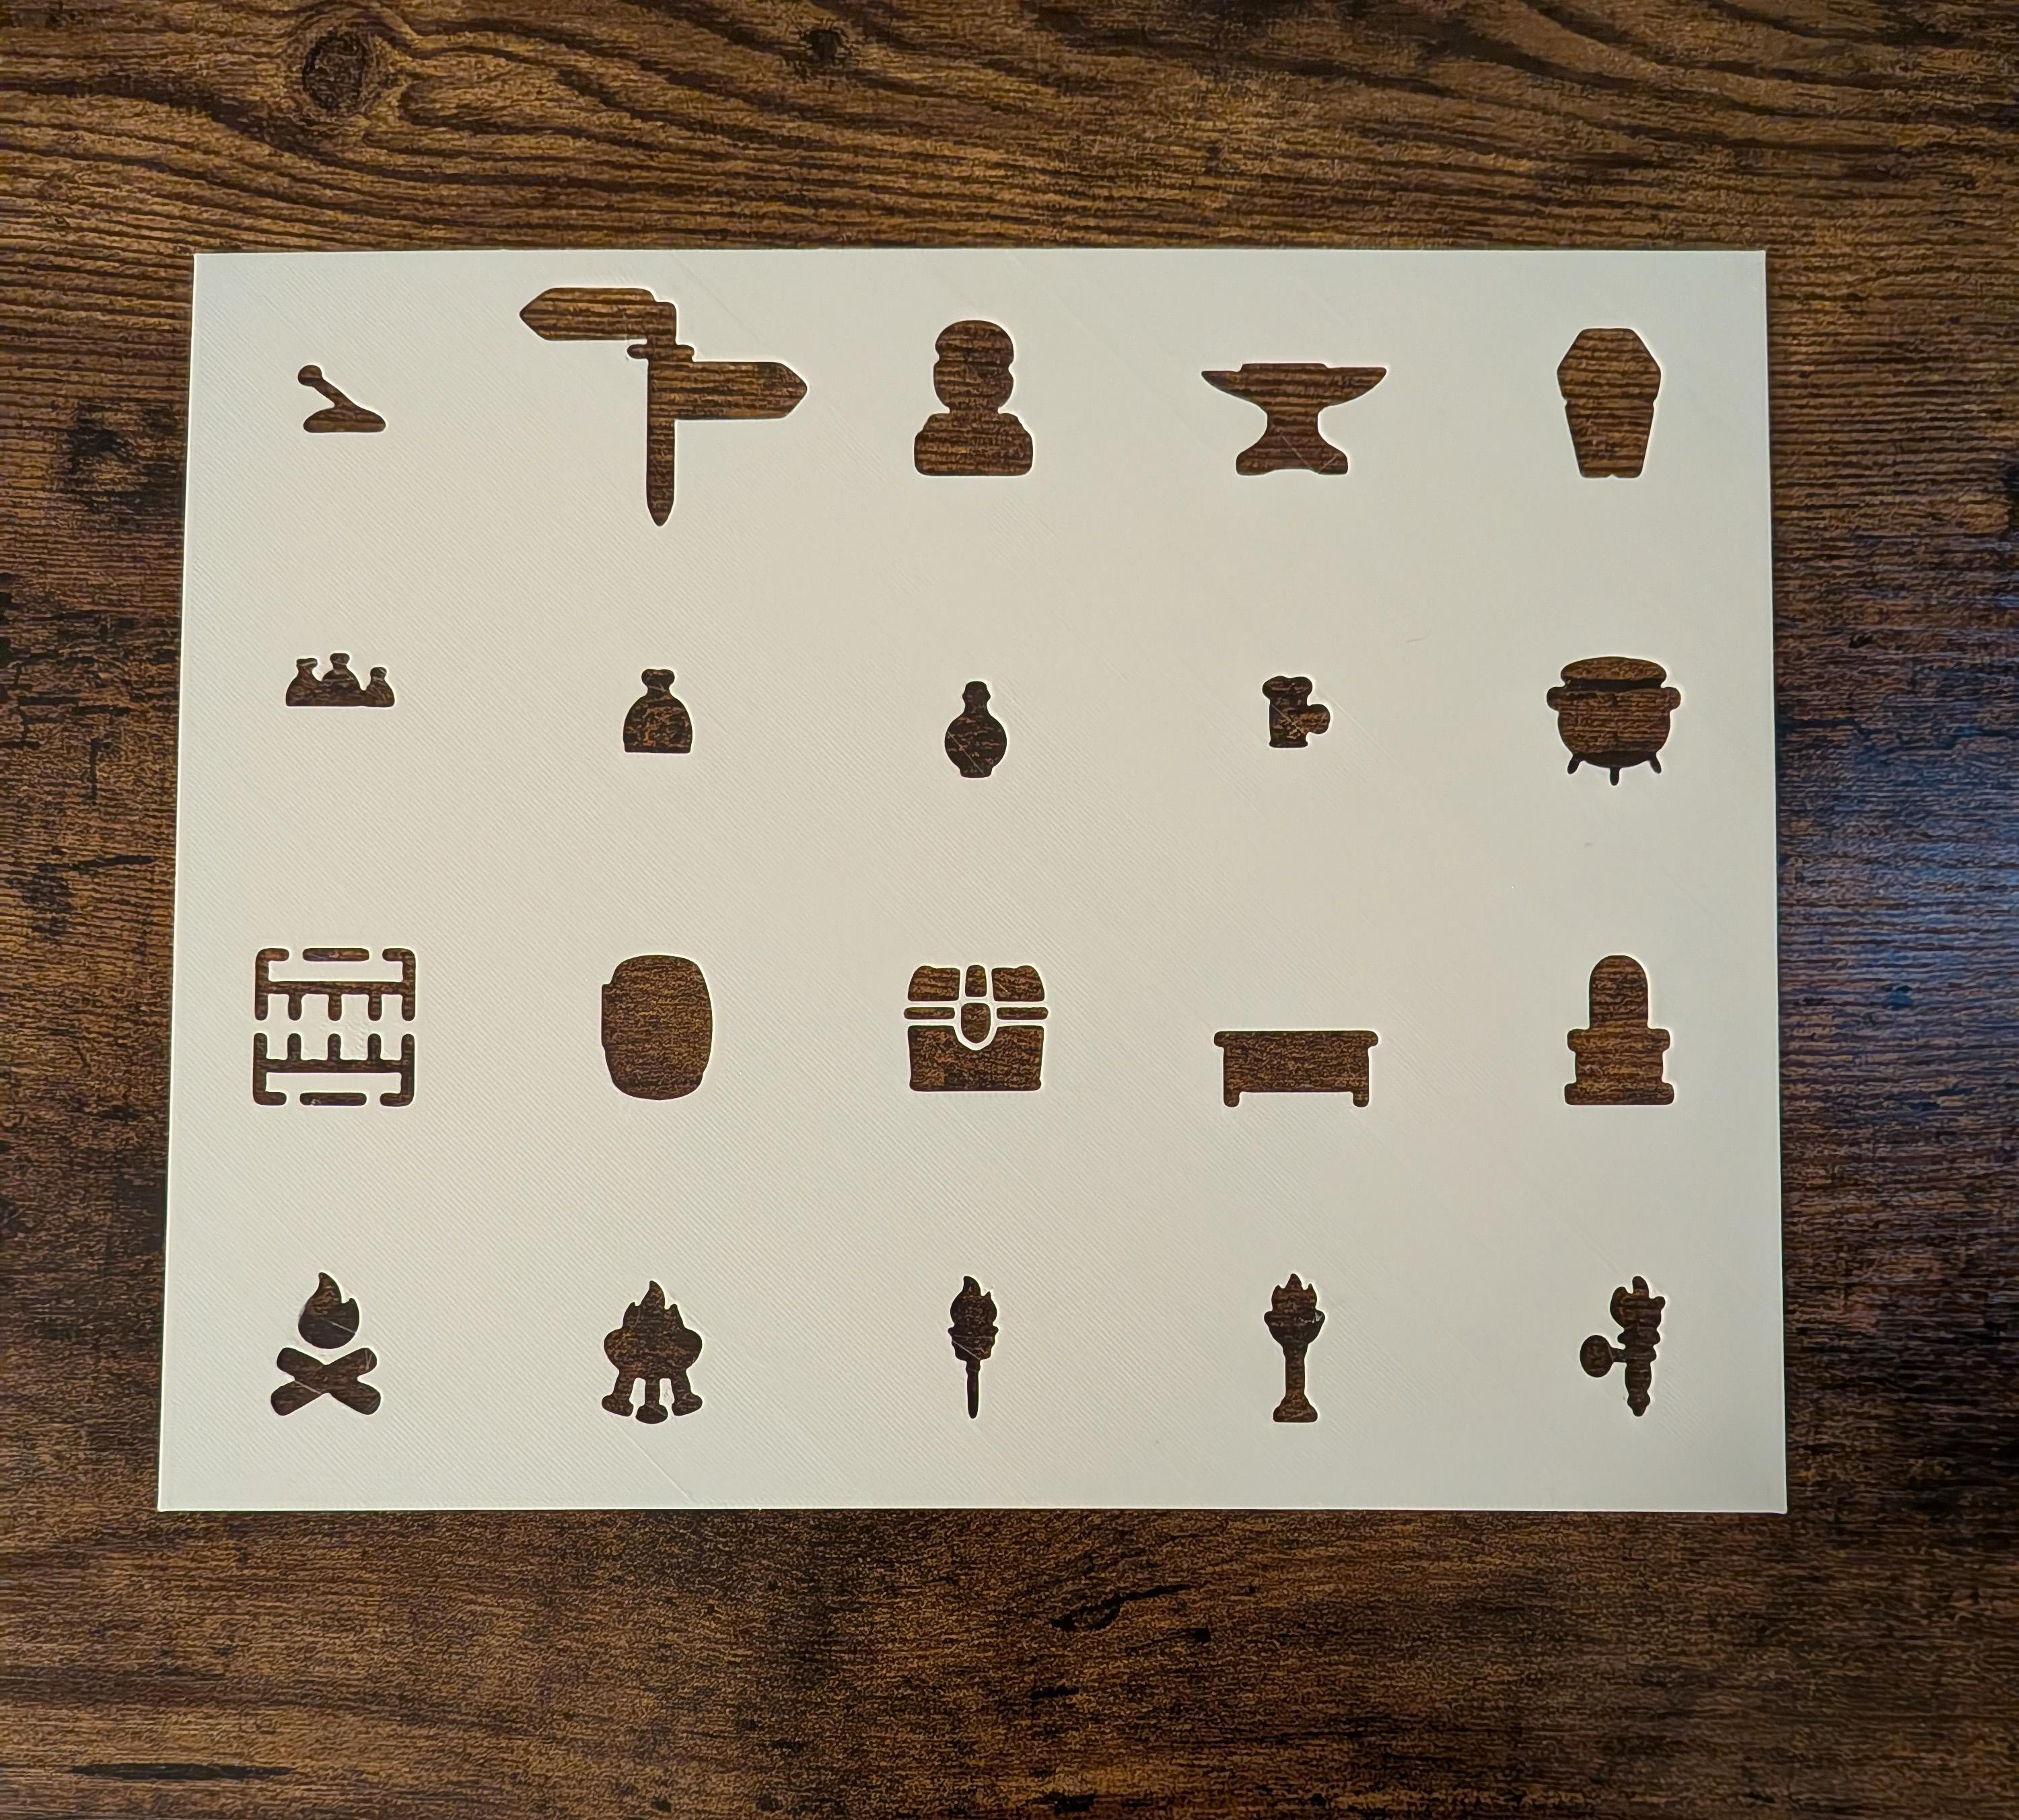
Where are the walls? Which doors are open? What provides cover? Where can enemies move? Is the floor dangerous? Can the party reach the treasure chest without crossing the fire?
Once those questions are clear, the map is doing its job.
The challenge is creating that map quickly. Drawing every wall, doorway, floor pattern, table, barrel, and weapon by hand can take longer than expected, especially when you are preparing several encounters or improvising during a session.
Reusable RPG stencils speed up the process by giving you recognizable shapes that can be traced directly onto a battle mat or sheet of paper.
In this guide, you will learn how to draw a D&D battle map in about 10 minutes using a simple step-by-step workflow.
What You Need to Draw a D&D Battle Map
You only need a few basic supplies:
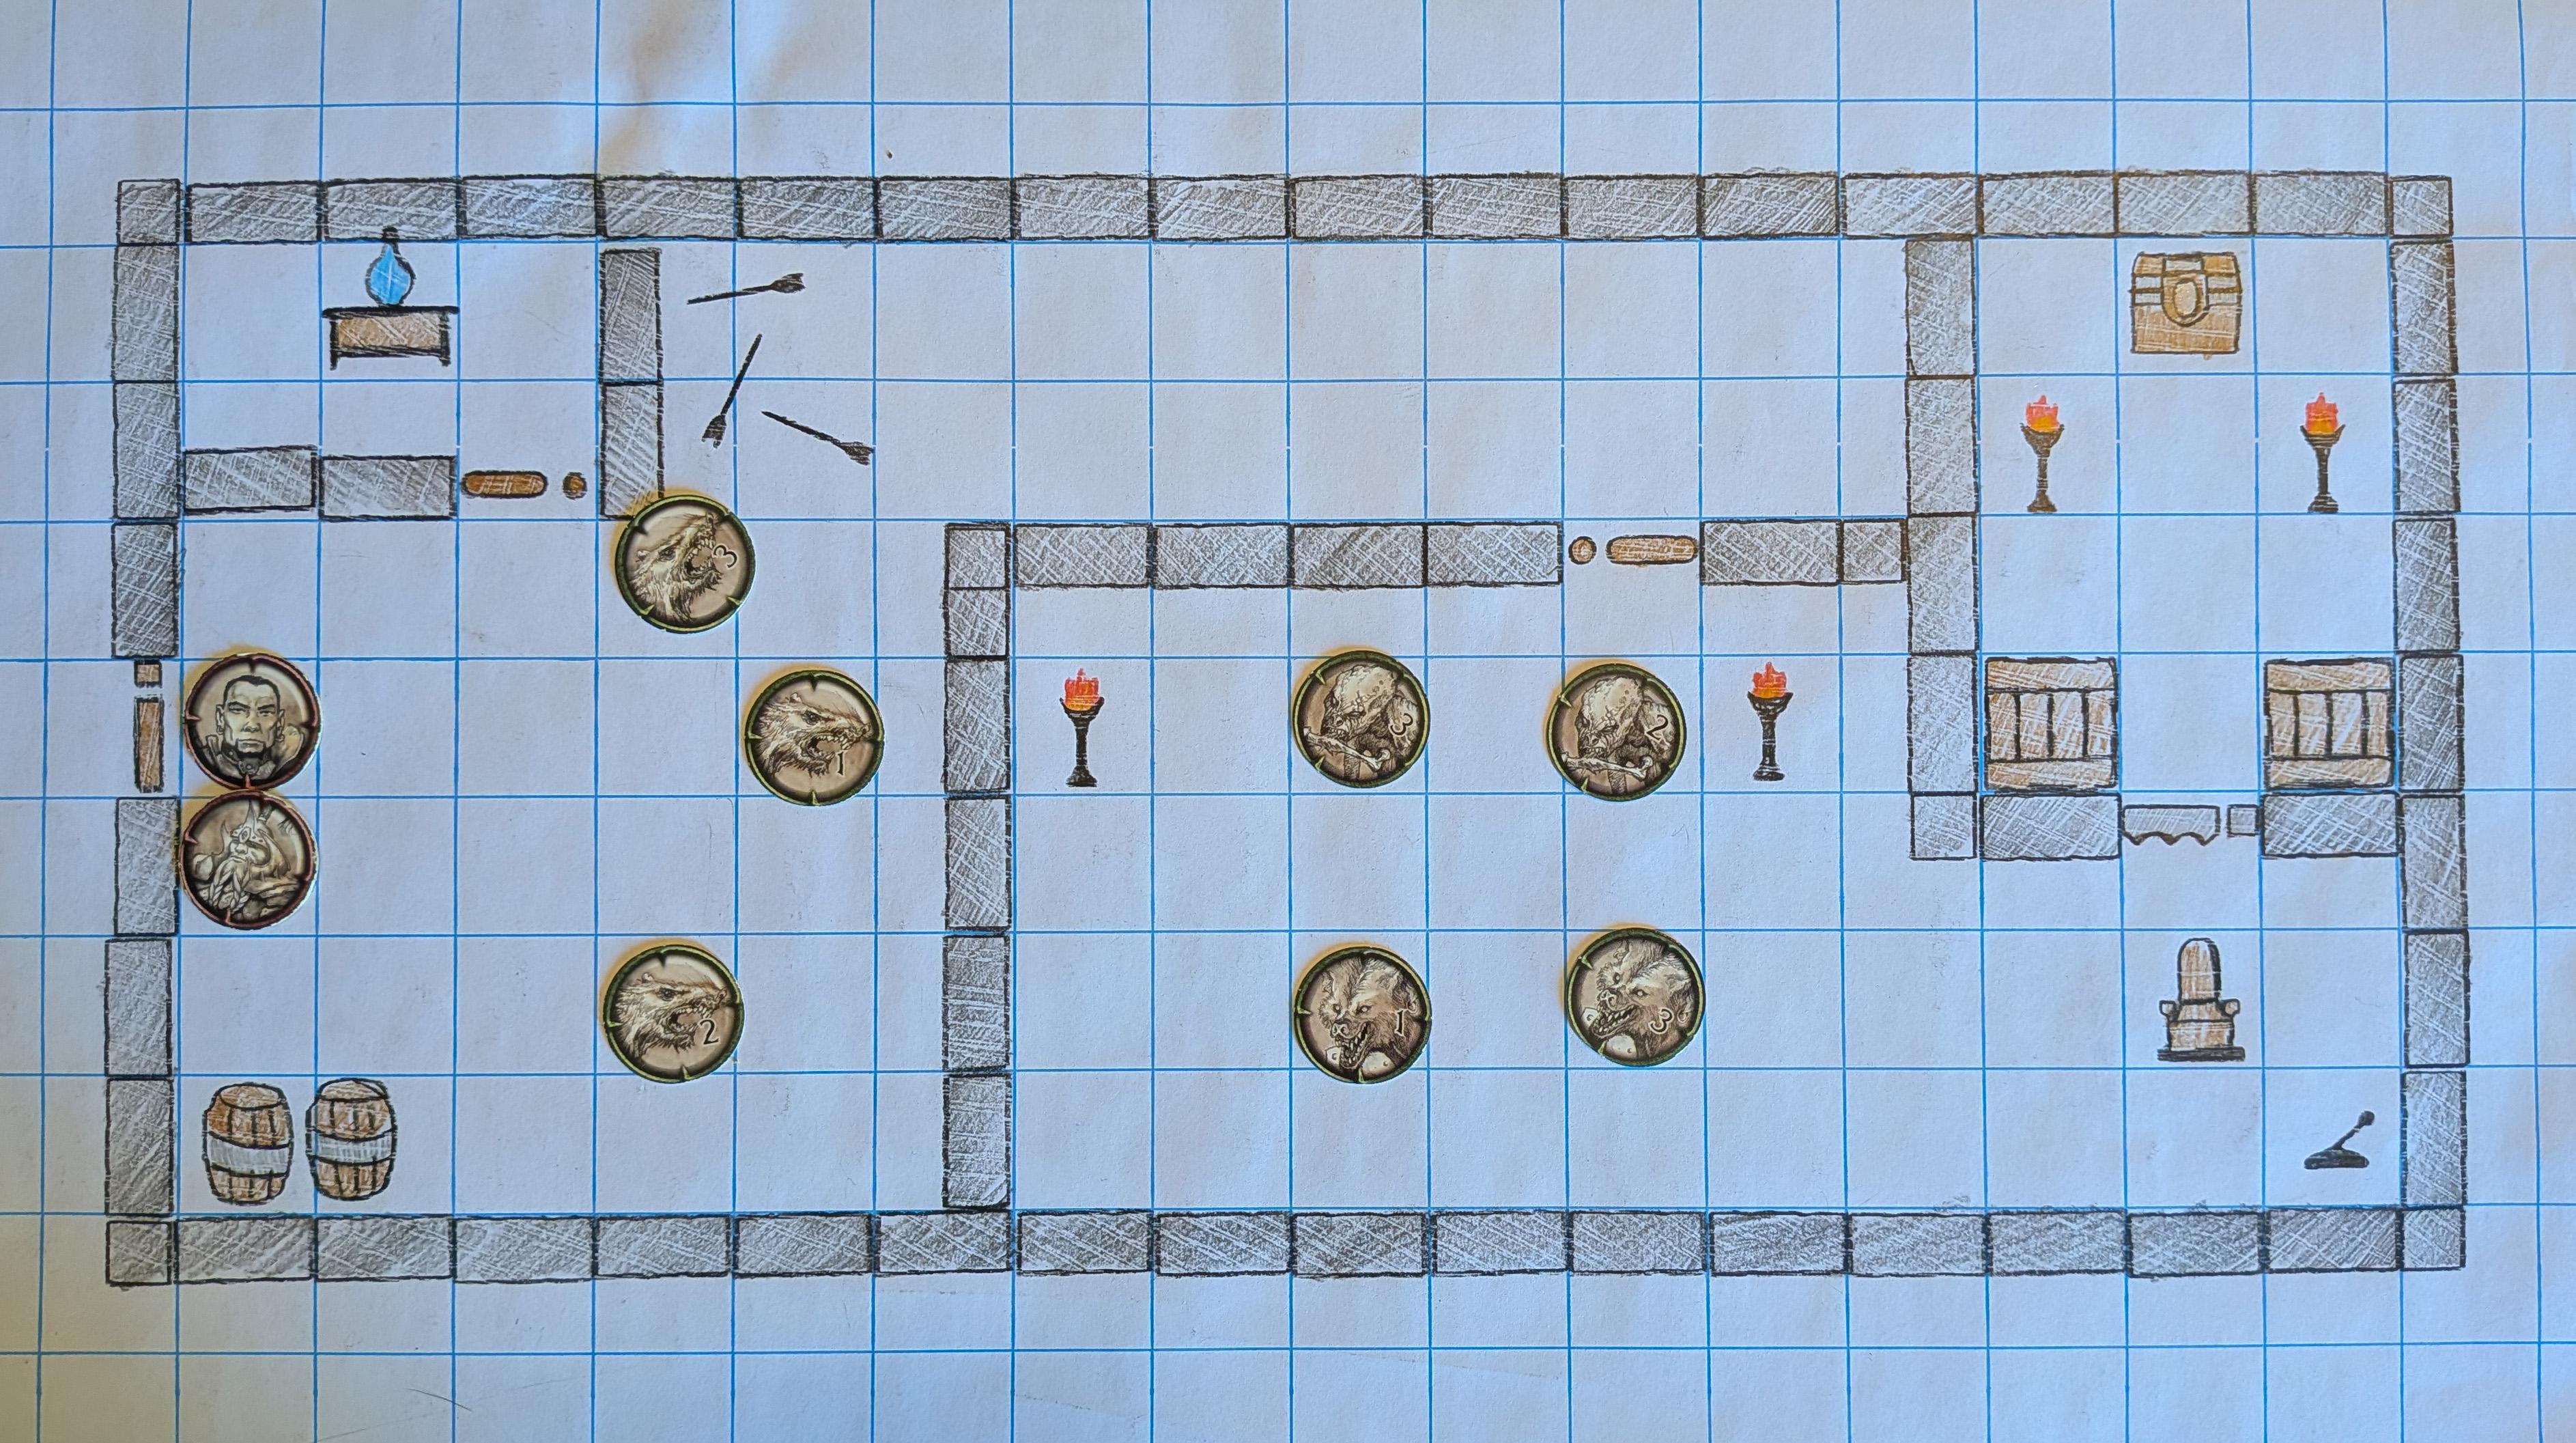
- A dry-erase or wet-erase battle mat
- Grid paper or plain paper
- A marker or pen appropriate for the surface
- A reusable D&D stencil set
- A simple encounter idea
- Miniatures or tokens, if you use them
Always check the instructions for your battle mat before choosing a marker. Test the marker in a small area to make sure it erases cleanly and does not stain.
For this example, we will create a small ruined guardhouse that can be used for an ambush, rescue mission, treasure search, or roadside encounter.
The 10-Minute Battle Map Plan
The fastest way to draw a map is to work from the largest features to the smallest.
Use this order:
- Choose the encounter objective
- Outline the main rooms
- Add doors and movement paths
- Mark terrain and floor materials
- Place cover and furniture
- Add hazards and story details
- Check the map with miniatures
Do not begin with tiny decorations. Establish the playable space first.
Minute 1: Decide What the Encounter Is About
Before drawing anything, identify the main purpose of the map.
For the ruined guardhouse, the encounter objective could be:
- Defeat the bandits occupying the ruins
- Rescue a captured traveler
- Recover a stolen supply chest
- Sneak through without raising an alarm
- Search the ruins for a hidden entrance
The objective determines which features matter.
For example, a rescue encounter needs a place for the prisoner. A stealth encounter needs multiple paths and hiding places. A defensive encounter needs choke points and cover.
You do not need to write a complete story. One sentence is enough:
> The party must enter a ruined guardhouse, defeat or avoid the bandits, and recover a locked chest.
That sentence gives the map direction.
Minutes 2–3: Draw the Main Walls
Begin with the largest structural elements.
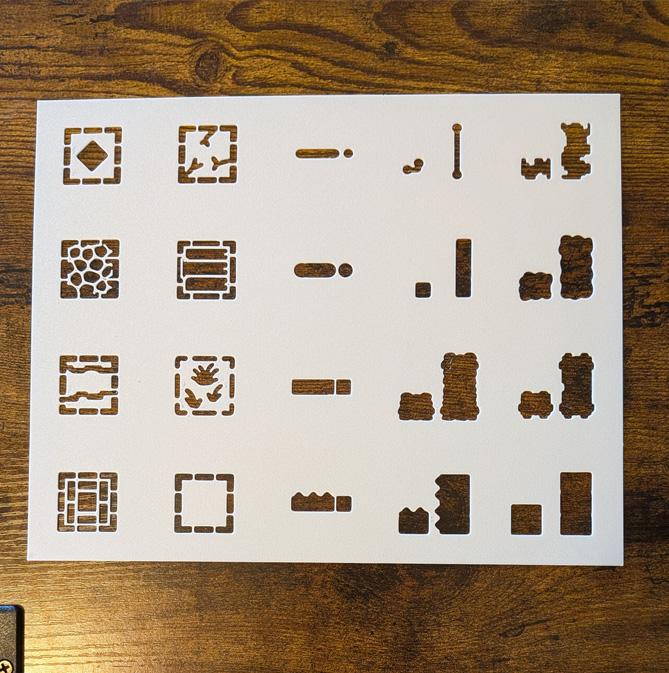
Place a wall stencil on the grid and trace the outside of the guardhouse. A simple rectangular structure is enough, but you can make it more interesting by adding:
- One broken corner
- A narrow side room
- A partially collapsed wall
- A short exterior wall
- A small courtyard
For this map, draw:
- One large main room
- One smaller storage room
- One broken section of outer wall
- One short passage connecting the rooms
Use stone or ruined wall patterns to communicate that the building is old and damaged.
Do not worry about perfect symmetry. Slightly uneven walls can make ruins, caves, hideouts, and old buildings feel more natural.
Keep the rooms large enough
Before finishing the walls, place a few miniatures inside the space.
Ask:
- Can four or five player characters fit inside?
- Is there room for enemies?
- Can creatures move around the furniture?
- Is there enough space for melee and ranged combat?
A room that looks large on paper can feel crowded once miniatures are added.
Minute 4: Add Doors and Openings
Next, decide how creatures enter, leave, and move through the map.
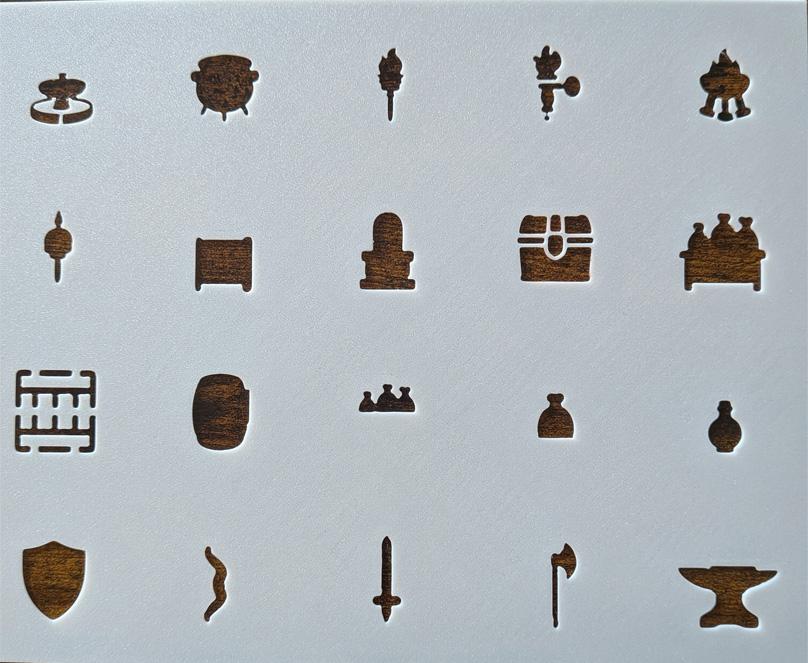
Use door stencils to add:
- A main entrance
- A doorway between rooms
- A broken opening in the wall
- A hidden or locked exit, if needed
The main entrance should be wide enough for the party to use, but a narrow interior door can create a tactical choke point.
For the ruined guardhouse, add:
- One large front doorway
- One small door into the storage room
- One gap in the damaged outer wall
Now the party has at least two ways to enter.
That simple choice makes the encounter more interesting. The players can charge through the front, sneak through the broken wall, or divide the group.
Minute 5: Add Floors and Terrain
Floor textures quickly establish the type and condition of a location.
Use a stencil to add small sections of:
- Stone floor
- Cracked floor
- Dirt
- Grass
- Wood
- Cobblestone
- Tile
You do not need to fill every square.
For the ruined guardhouse, add cracked stone flooring in the main room and dirt or grass near the collapsed wall. This suggests that the building has been exposed to the weather.
Outside the structure, add a few patches of grass or rough ground to define the surrounding area.
Floor texture can also affect gameplay.
You might decide that:
- Loose rubble counts as difficult terrain
- Cracked flooring hides a weak section
- Mud reduces movement
- Burning floor spaces deal damage
- A raised platform provides an advantage
Only add a mechanical effect when it improves the encounter. Not every texture needs a rule.
Minutes 6–7: Place Cover and Furniture
Now add objects that make the location feel inhabited and create tactical decisions.
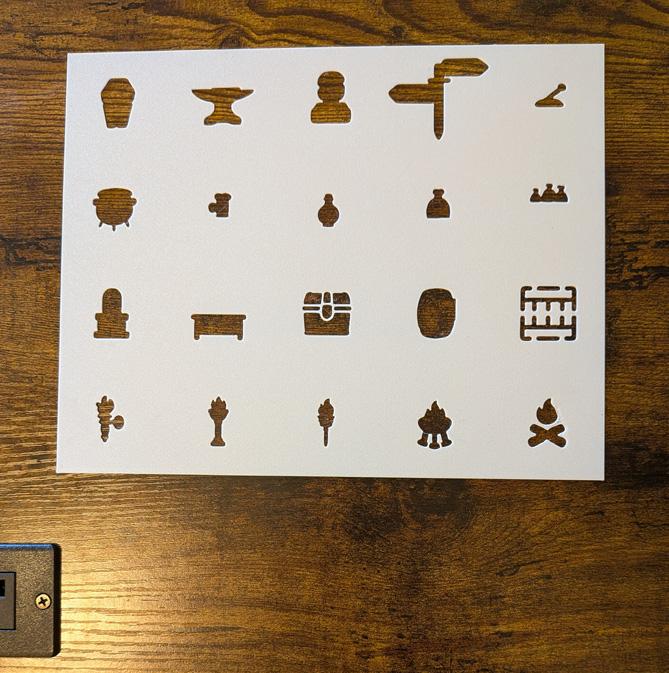
For the guardhouse, use stencils to add:
- Two crates
- One barrel
- A small table
- A chest
- A standing torch or wall torch
- A pile of bags
- A weapon near the table
Place these objects with purpose.
Crates near the broken wall can provide cover. A barrel beside the entrance can narrow the movement path. A table in the center of the room can divide the battlefield. A chest in the storage room gives the players a clear objective.
Objects should help answer one of three questions:
- What is this room used for?
- How does this affect movement or combat?
- What can the players interact with?
A random barrel adds visual detail. A barrel that can be rolled down a corridor, broken open, or used as cover adds gameplay.
Minute 8: Add a Hazard or Tactical Feature
A simple map becomes more memorable when it includes one unusual feature.
Choose only one or two. Too many hazards can make a small encounter difficult to understand.
Possible features include:
- A fire pit
- A hidden trap
- A collapsed floor
- A barricade
- A locked door
- A ladder
- A staircase
- A raised platform
- An unstable wall
- A lever
- A brazier that can be overturned
For the guardhouse, place a brazier near the center of the main room.
During the encounter, a creature might push it over and create a line of fire. Alternatively, the players might extinguish it to darken the room.
You can also mark a cracked section of floor near the storage room and decide that it collapses when a heavy creature crosses it.
The map does not need complex rules. One interactive element is often enough.
Minute 9: Add Story Details
Small symbols can communicate what happened before the party arrived.
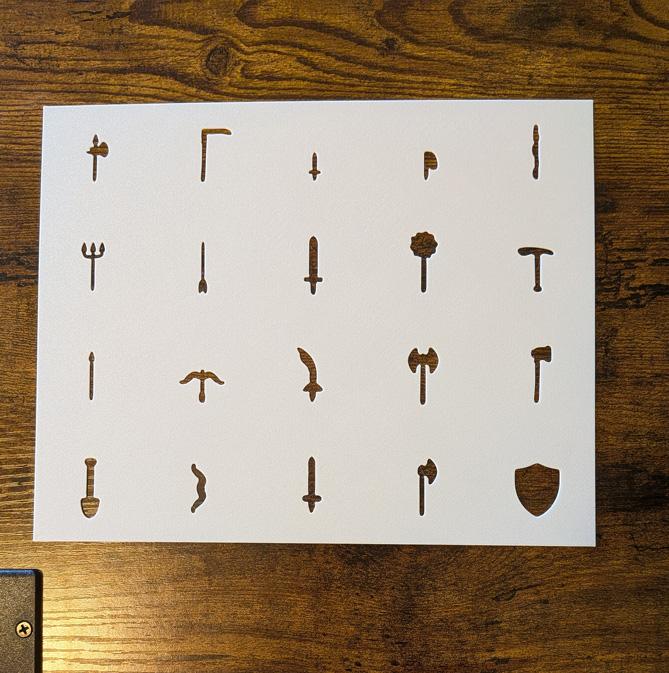
Add two or three details such as:
- A dropped sword
- A broken shield
- A discarded tankard
- An open chest
- A blood trail
- A burned table
- A pile of tools
- A gravestone
- A damaged door
- Scattered arrows
For the guardhouse, place a dropped weapon near the broken wall and a bag beside the chest.
These details create questions.
Why was the weapon abandoned? Did someone escape through the wall? What is inside the bag? Is the chest really the stolen one?
You do not need to explain every object. Let the players investigate and form their own theories.
Minute 10: Test the Map
Before the encounter begins, place miniatures or tokens on the map and perform a quick check.
Confirm that:
- The party can enter the map
- Enemies have reasonable starting positions
- Doors and passages are visible
- Important objects are recognizable
- Miniatures fit around the furniture
- The objective is easy to identify
- There is at least one meaningful choice
For the ruined guardhouse, you might place:
- Two bandits near the table
- One guard behind the crates
- One leader near the storage-room door
- The stolen chest in the small room
- The party outside the front entrance
You now have a playable battle map.
The map includes multiple entrances, cover, a choke point, a hazard, an objective, and enough open space for movement.
The Finished Battle Map
After about 10 minutes, the map contains:
- A ruined stone guardhouse
- A large main room
- A small storage area
- A front entrance
- A broken side entrance
- Cracked flooring
- Crates and barrels for cover
- A table and torch
- A brazier hazard
- A locked chest
- Several story clues
The location can support combat, exploration, negotiation, stealth, or a combination of all four.
It is not a detailed work of art, but it gives the players the information they need to make decisions.
That is the purpose of a battle map.
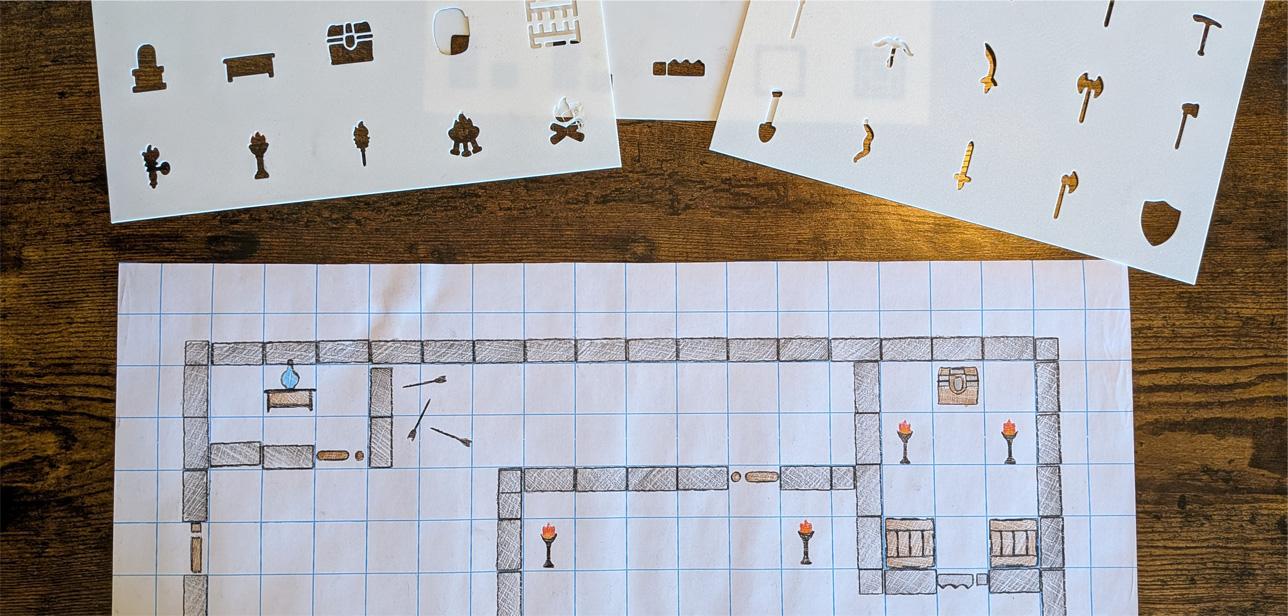
How Reusable Stencils Make Battle Maps Faster
The most time-consuming part of hand-drawing a map is often not the overall layout. It is drawing recognizable details repeatedly.
A reusable stencil helps by providing ready-made shapes for common features.
Instead of stopping to sketch a barrel, you can trace one. Instead of trying to draw multiple matching doorways, you can use the same template. Instead of filling a room with individual floor tiles, you can add a section of texture in a few movements.
This can make maps faster in several ways.
Consistent walls and doors
Straight walls and clearly sized doors make the map easier to read. Reusable templates also help you maintain a consistent visual style across multiple encounters.
Faster environmental details
Furniture, weapons, treasure, traps, and lighting can be added without drawing every object from memory.
Easier improvisation
When the players enter an unexpected building or begin a fight in an unplanned location, you can assemble the map from familiar pieces.
Reusable layouts
The same stencil set can create a tavern, crypt, castle, camp, warehouse, hideout, temple, dungeon, or roadside ruin.
The shapes remain the same, but their arrangement changes.
A Faster Method for Live Sessions
When drawing a map during the game, simplify the process even further.
Use this four-step version:
- Draw the walls
- Add entrances
- Place essential cover
- Mark the objective or hazard
Skip floor textures and decorative details until they become relevant.
For example, when the players suddenly start a fight in a tavern, you may only need:
- Four outer walls
- One front door
- One back door
- Three tables
- A bar
- Two barrels
- A staircase
That is enough to begin combat.
Additional details can be added while players roll initiative or decide what to do.
How to Draw Different Types of D&D Battle Maps
The same 10-minute method can be adapted to many locations.
Dungeon Room
Start with stone walls and narrow corridors.
Add:
- Small and large doors
- Stone or cracked floors
- Torches
- Chests
- Traps
- Stairs
- Rubble
- Weapons
Include one secret route or environmental hazard to make the room more interesting.
Tavern
Start with wood walls and wood floors.
Add:
- Tables
- Barrels
- Tankards
- A fireplace
- A serving counter
- Stairs
- A back entrance
- An upstairs room
Leave space between the tables for miniatures and movement.
Bandit Camp
Start with grass or dirt terrain instead of walls.
Add:
- Tents
- A campfire
- Crates
- Bags
- Fences
- A cart
- Logs
- A watch position
Arrange the objects so the party can approach from more than one direction.
Crypt
Start with stone walls, small rooms, and narrow passages.
Add:
- Gravestones
- Coffins or tombs
- Braziers
- Cracked floors
- Stairs
- A hidden chamber
- A central altar or treasure chest
Use symmetry for formal tombs and irregular layouts for older, damaged crypts.
Warehouse
Start with a large rectangular room.
Add:
- Crates
- Barrels
- Bags
- Tables
- A loading entrance
- A smaller office
- A ladder
- An elevated platform
Warehouses work well for encounters involving cover, climbing, hiding, and moving objects.
Common Battle Map Mistakes
Drawing quickly does not mean drawing carelessly. Avoid these common problems.
Making every room too small
A room may look reasonable until six miniatures and several enemies are placed inside it.
Test the space before adding furniture.
Adding too much detail
Decorative textures and objects can make the grid difficult to see.
Prioritize information that affects movement, combat, or exploration.
Creating only one entrance
A single doorway can make an encounter feel static.
Add a second entrance, broken wall, window, staircase, or hidden route when possible.
Blocking all movement with furniture
Cover is useful, but players still need room to move.
Leave clear paths between important areas.
Making every object decorative
Whenever possible, let the players interact with the environment.
A table can be overturned. A crate can be climbed. A brazier can be pushed. A lever can open a gate.
Revealing secret information too early
Do not draw secret doors, hidden traps, or concealed enemies on the player-facing map unless the characters have discovered them.
Keep those details in your notes and add them when needed.
Tips for Drawing Battle Maps Even Faster
Prepare a small encounter list
Keep a list of common locations you can build quickly:
- Roadside camp
- Small dungeon
- Tavern
- Cave
- Guard post
- Warehouse
- Crypt
- Town square
When you need an unexpected map, choose one and adjust it to fit the situation.
Practice common layouts
Draw the same type of room several different ways.
Over time, you will become faster at estimating size, placing doors, and leaving enough room for combat.
Keep your tools organized
Store stencils, markers, erasers, tokens, and the battle mat together.
The faster you can reach the tools, the easier it is to create a map during play.
Use partial textures
A small patch of stone, wood, dirt, or grass is often enough to communicate the surface.
You do not need to shade the entire battlefield.
Use symbols consistently
Choose the same symbol for doors, traps, stairs, and other important features across your maps.
Players will learn to recognize them quickly.
Do You Need to Finish the Entire Map Before Playing?
No.
Many Game Masters draw only the area the players can currently see.
You can begin with an entrance and one room, then add corridors and chambers as the party explores. This is especially effective in dungeons, caves, castles, and hideouts.
Gradual drawing has several advantages:
- Secret rooms remain hidden
- Players cannot predict the full layout
- Preparation time is reduced
- The map can adapt to player choices
- Exploration feels more uncertain
Reusable stencils work well for this approach because new rooms and objects can be added quickly.
Build Fast D&D Battle Maps with RPG Stencils
RPG Stencils are designed to help Game Masters create clear, flexible battle maps without drawing every feature from scratch.
Use reusable walls, floors, doors, furniture, weapons, lighting, treasure, and environmental details to build encounters before the session or directly at the table.
A useful battle map does not need to take hours.
Start with the walls, add the important paths, place a few tactical objects, and give the players something meaningful to interact with.
In about 10 minutes, you can turn an empty grid into a dungeon, tavern, ruin, hideout, camp, crypt, warehouse, or other adventure location.
Frequently Asked Questions
How do I draw a D&D battle map?
Start by choosing the encounter objective. Draw the main walls and rooms, add doors and movement paths, then place terrain, furniture, cover, hazards, and important objects. Test the map with miniatures before play begins.
How long does it take to draw a D&D battle map?
A simple battle map can be drawn in about 10 minutes with a clear plan and reusable stencils. Larger maps or highly detailed locations may take longer.
Do I need to be an artist to draw a battle map?
No. A battle map only needs to communicate the playable space clearly. Reusable stencils can help create recognizable walls, doors, floors, furniture, weapons, and props without advanced drawing skills.
What should be included on a D&D battle map?
Include walls, entrances, movement paths, terrain, cover, hazards, objectives, and any objects the players can interact with. Decorative details are optional.
What size should D&D battle-map rooms be?
Room size depends on the number of creatures and the type of encounter. Before adding furniture, place miniatures on the grid to confirm that everyone has enough room to move and fight.
Can I draw a D&D battle map during the session?
Yes. For an improvised encounter, draw only the walls, entrances, essential cover, and main objective. Add more details as they become relevant.
What is the best surface for a reusable battle map?
Dry-erase mats, wet-erase mats, grid paper, and plain paper can all work. Always use markers recommended for the chosen surface and test them before creating a complete map.
Can reusable stencils be used for outdoor maps?
Yes. Grass, dirt, fences, campfires, crates, walls, and other symbols can be combined to create camps, roads, ruins, ambush sites, and wilderness encounters.
Should I draw the entire dungeon at once?
Not necessarily. Drawing rooms as the party explores can preserve surprises and reduce preparation time.
What makes a good D&D battle map?
A good battle map is easy to understand, large enough for miniatures, and filled with meaningful choices. Multiple entrances, useful cover, interactive objects, and clear objectives make encounters more engaging.